

 Mä uskon että meillä kaikilla on se kaveri, joka, humalassa tai ei, onnistuu aina satuttamaan itsensä. Tunnistat tämän kaverin siitä, että seinät tulevat hänen tielleen, hänellä on tapana hyökätä lattialle yhtäkkiä ja hänen raajansa ovat täynnä mustelmia, koko väriskaala aina tummanvioletista kellertävään. Ei ole aina helppoa olla hänen kaverinsa - sinun täytyy kuljettaa ensiapupakettia kaikkialla, pitää sairaalan numeroa pikavalinnassa ja erityisesti osata kontrolloida naurusi, kun he kaatuvat portaat alas. Mulla on kuitenkin hyviä uutisia kaikille joiden täytyy olla näitä ystäviä - nyt on vähintään olemassa täydellinen lahja, jonka voit tehdä kömpelölle kaverillesi.
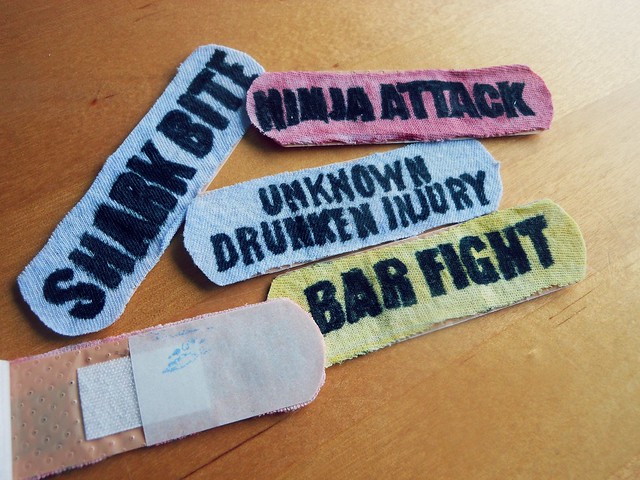
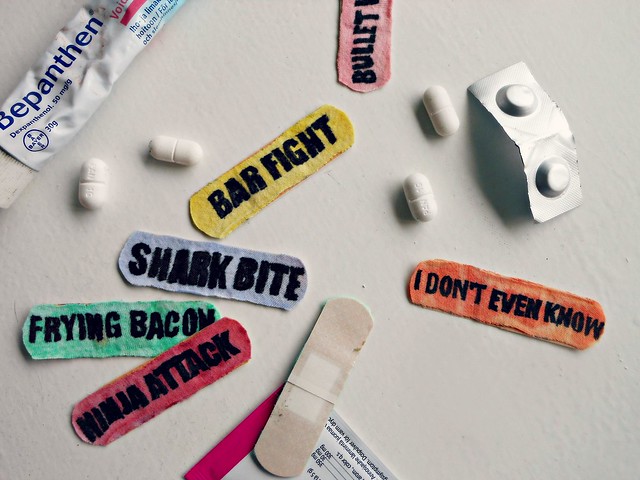
Nämä (lähes) itsetehdyt laastarit kertovat, mitä uhrille on tapahtunut. Voit laittaa niihin persoonallisia insideläppiä tai normaaleja jokapäiväisiä tapaturmia, kuten hain pureman, ninjojen hyökkäyksen tai ampumahaavan. Mä tein näitä laastareita poikaystävälleni. Mulla on terävät kynnet joilla aina satutan häntä, joten yhdessä laastarissa lukee "girlfriend". Joka kerta kun hän juo, hän saa mustelman tai haavan, joten yhdessä lukee "unknown drunken injury". Ja lähes viikottain hän saa pieniä ruhjeita, joten yhdessä sanotaan "I don't even know". Mutta siirrytään eteenpäin, tässäpä ohje, miten minä tein ne!
I think we all have that one friend who, intoxicated or not, always manages to get hurt. You can recognize this friend if the walls get in their way, they tend to attack the floor randomly and their limbs are covered in bruises, all from dark purple to yellowish ones. It's not always easy being their friend - you have to carry a first aid package everywhere, have the hospital's number in speed dial and especially know how to control your laugh when they fall down the stairs. However, I have good news for everyone that needs to be that friend - now there's at least a perfect gift you can make for your awkward friend.
These (almost) homemade band-aids tell what has happened to the victim. You can put your personal inside jokes in them or casual everyday incidents, such as shark bite, ninja attack or bullet wound. I made these band-aids for my boyfriend. I have sharp nails and I always hurt him with them, so one band-aid says "girlfriend". Every time he drinks, he gets a bruise or a scar, so one says "unknown drunken injury". Almost weekly he gets small contusions, so one says "I don't even know". But let's move on, here's how I made them!
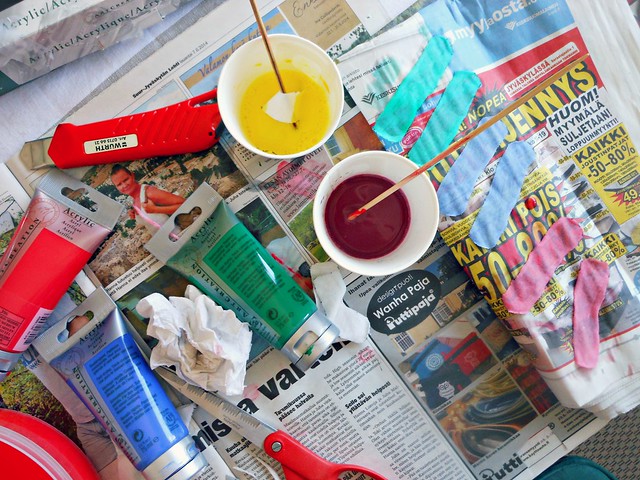
Voit käyttää kangasta tai jopa maalarinteippiä - mikä tahansa vain tuntuu toimivalta. Mä käytin kangasta, joten käytän sitä termiä näissä ohjeissa. Leikkaa kankaanpalasia normaalin kaupastaostetun laastarin kokoisiksi. Nyt voit värjätä ne, jättää ne valkoisiksi tai käyttää alunperinkin erivärisiä kankaita - mulla ei ollut yhtään kangasta kotona, joten jouduin leikkelemään oman valkoisen t-paidan ja värjätä kaikki kankaanpalat. Värjäämisprosessi on suhteellisen helppo, sen voi tehdä aika pitkälti kaikella mikä jättää tahroja tai väriä jälkeensä. Mä miksailin akryyliväriä veteen, sekoitin ja heitin palaset sekaan ja hetken odottelun jälkeen nostin ne pois ja laitoin kuivumaan. Jos niissä ei ole yhden värjäyskerran jälkeen tarpeeksi väriä, voit värjätä ne kaksi tai kolmekin kertaa.
Värjäämisen jälkeen voit siirtyä suoraan kirjoitusosaan, mutta jos palat ovat ryppyisiä, suosittelen silittämään ne, jotta ne ovat täysin suoria. Suosittelen myös, että laitat kankaan päälle palan leivinpaperia, koska ei oikeastaan koskaan voi tietää päästääkö kangas vähän väriä ja uskoisin, ettet tosiaan halua itsellesi sinistä silitysrautaa. Ja jos silitysraudan ja -laudan kaivaminen kaapista tuntuu liian työläältä, myös tavallinen hiusten suoristusrauta hoitaa asian - sitä minäkin käytin!
Now, you can use fabric or even painter's tape - whatever seems suitable. I used fabric, so I'll be talking about fabric in these instructions. Cut pieces of fabric to the size of regular store-bought band-aids. Now you can dye them, leave them white or you can use different colored fabrics - I didn't have any fabric at home so I had to cut a white t-shirt in pieces and dye all the fabric strips. The dyeing process is quite easy, you can do it with pretty much anything that leaves stains and color. I mixed acrylic paint with water, threw the strips in and after a while set them to dry. If they don't have enough color, you can always dye them two or even three times.
After dyeing you can either move directly to the writing part, but if the strips are wrinkled I suggest you iron them so that they are completely straight. I also suggest you put a piece of parchment paper on top because you never know if it will let go some color and you don't want to end up with a blue iron. And if you don't feel like setting up your ironing board and iron, a hair straightener will do the trick as well - that's what I used!
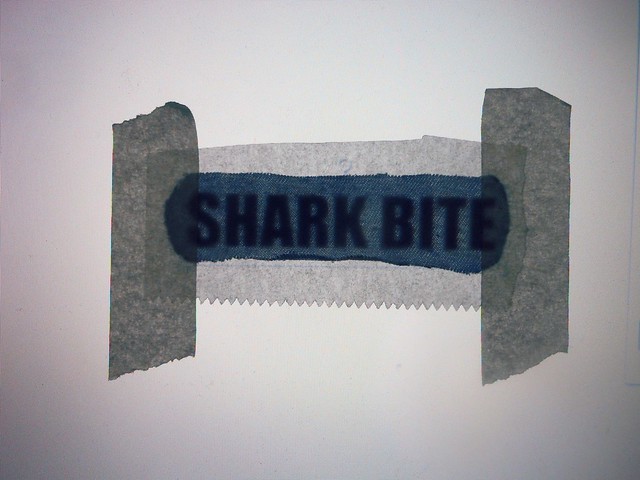

Nyt kirjoitusosaan. Teippasin palan leivinpaperia koneen näytölle, sitten kankaanpalan ja kirjoitin koneella tekstin, jonka siirtelin kankaanpalan alle. Älä missään nimessä unohda leivinpaperia, sillä jos näin käy, sulla on kohta tussintöhrimä näyttö. Piirtele mustalla tussilla pelkästään kirjaimien ääriviivat ja väritä ne myöhemmin tai väritä koko juttu suoraan koneen näytön ääressä kerralla - miten vain tahdot.
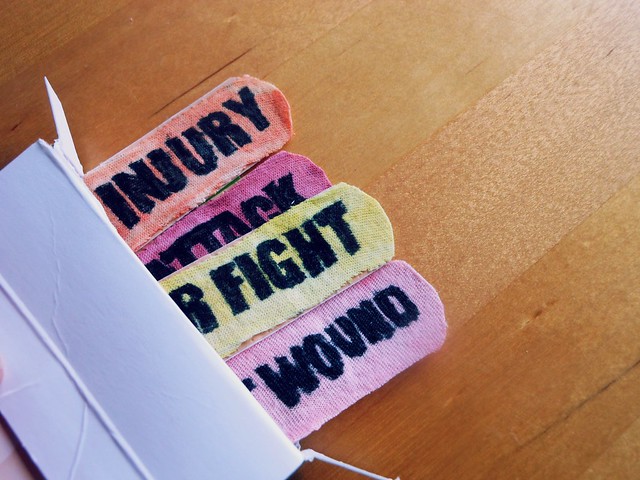
Kun kankaanpalaset ovat valmiit, olet lähellä maaliviivaa. Nyt ainoa askel onkin levittää pensselillä liimaa laastarien päälle ja painaa kankaanpalat päälle. Kun liima on kuivunut, lopputuloksena on täydellisen toimivia laastareja, jotka ovat samalla hauskoja ja persoonallisia.
Now to the writing part. I taped a piece of parchment paper onto my computer screen, then the fabric strip and wrote my text on my computer and placed it under the fabric. You don't want to forget the parchment paper because if you do, you'll end up with a marker-stained computer screen. With a black marker you can only draw the outlines and color in the letters later, or color it completely all at once.
When the strips are done you're very close to the finishing line. Now the only step is to brush glue on your band-aids and press the fabric strips on top. After the glue has dried, you have perfectly functional band-aids that are funny and personal at the same time.

Eikä, aivan ihana! :D
VastaaPoistaHahah ihana et tykkäsit :-D
PoistaTää oli mulle ihan täydellinen lahja! Kiitos rakas <3 c:
VastaaPoistaApua sinä. Olehyvä raks :-D <3
PoistaThe shark bite's is so funny! Cute idea!
VastaaPoistaThank you sooo much! The shark bite one was my favorite as well ;-)
PoistaWonderful! I'm picturing them on my 2 year old grandaughter--especially the shark bite, since we live on Oregon, with a beautiful coast. Thank you for the laugh, Kate in Oregon
VastaaPoistaHow funny that I made them for my 18-year-old boyfriend and you can picture them on your daughter. Thank you for the comment!
PoistaSUUUUPER!
VastaaPoistait´s too sad that i can´t pin it!
VastaaPoistaGlad you liked it! It's a shame that pinning from my blog is way too complicated, however luckily this post is already on Pinterest! You can find it here: http://www.pinterest.com/pin/544794886146525398/
Poista