Näytetään tekstit, joissa on tunniste party. Näytä kaikki tekstit

2014/09/03

♣ I am thankful.

Musta ei oo olemassa mitään tylsempää kuin kaupasta ostetut kortit, joten mä teen kortit itse jokaiseen tapahtumaan. Kuitenkin työnteon yllättää usein pieni ongelma: jos lähettelen kortteja useammille ihmisille, korttien täytyy olla identtiset ja sitä on aika vaikea saavuttaa käsin. Tai, no... oli vaikea saavuttaa, kunnes keksin tämän.

Tässä postauksessa näytän teille, miten lisätä identtistä tekstiä kortteihin ilman maalia, leimoja, tulostinta tai mitään kallista. Kaikki mitä tätä varten tarvitset ovat tussi (mä käytin kultaista), pala muovia (muovitasku sopii hyvin ja sellainen löytyy varmasti jokaisen kotoa), mattopuukko sekä nättejä korttipohjia.

I think there is absolutely nothing more boring than a store-bought card so I make cards myself for every occasion. However, usually there is one small problem: if I'm sending cards to a bunch of people, the cards have to be identical and that is slightly difficult to achieve by hand. Or... it used to be, until I came up with this idea.

In this post I'm gonna show you how to add identical text to cards without paint, stamps, a printer or anything expensive. Because everything you will need is a marker (I chose gold), a piece of plastic (a plastic folder will do the trick and that's probably something you already have at home), a box cutter and some pretty card bases.
thankyou1
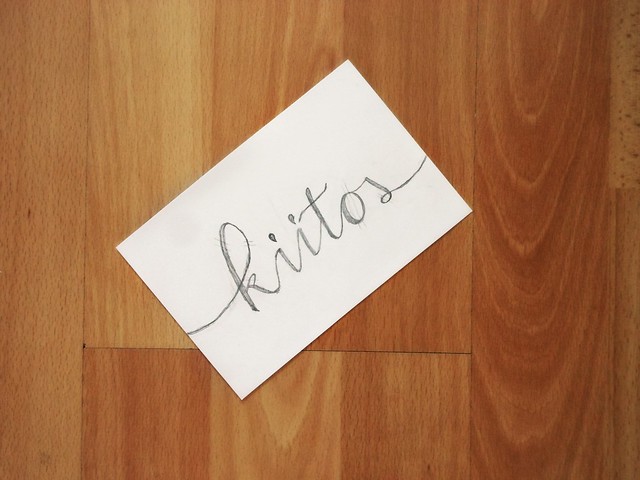
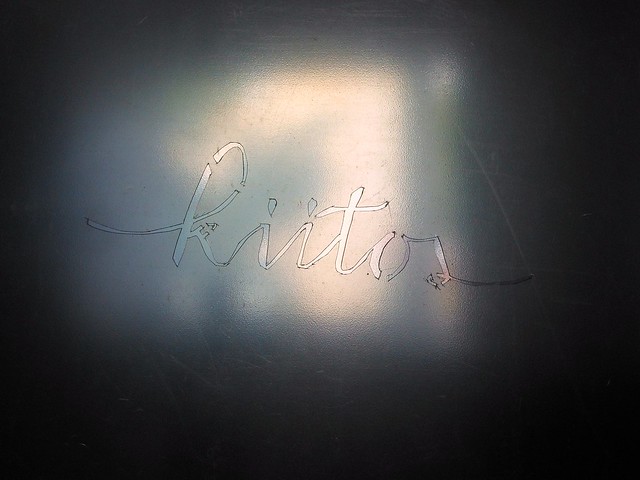
Ensimmäisenä luonnostele teksti paperille. Varmista, että sisäosat kirjaimista, kuten a, e, o ja p pysyvät paikoillaan pikkuliuskoilla muovia, jotka jätät leikkaamatta.

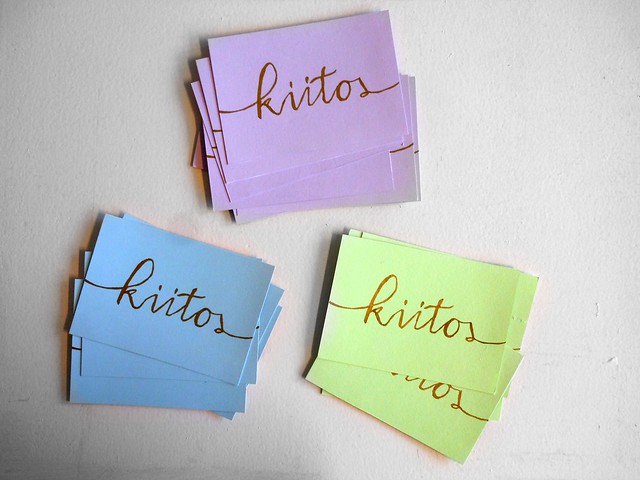
First sketch your text on a piece of paper. Make sure the inner pieces of letters like a, e, o and p have a string of plastic that holds them in place. I made thank you cards, so my text was "kiitos" (thank you in Finnish).
thankyou2
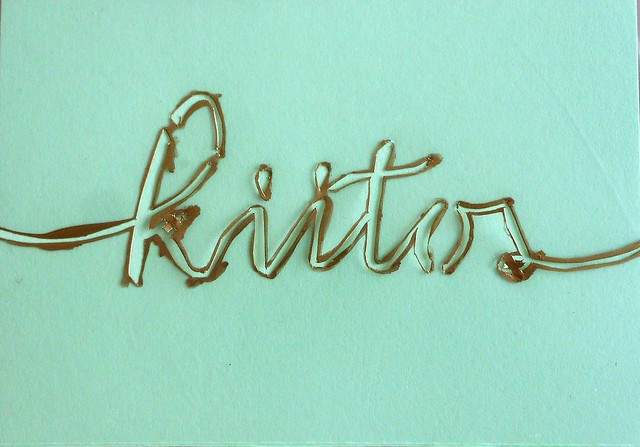
Aseta muovitasku luonnoskortin päälle ja leikkaa mattopuukolla luonnosviivoja pitkin.

Place a plastic folder on top of the sketch card and with a box cutter cut along the lines you've drawn.
thankyou3
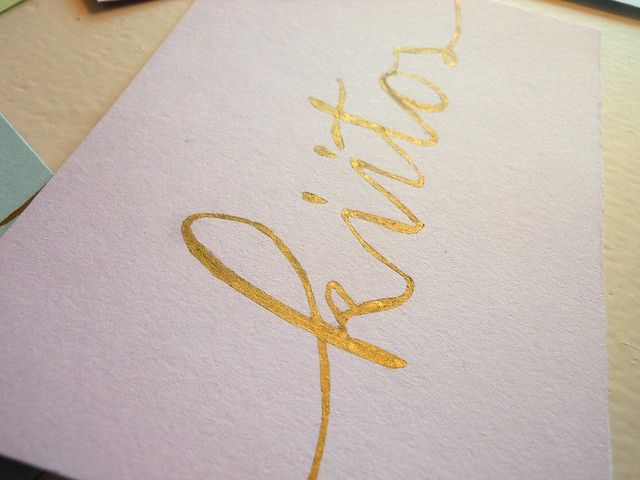
Kun tämä on valmista, laita korttipohja muovitaskun alle. Ala nyt hitaasti värittämään tekstiä viivojen sisäpuolelta tussilla. Älä anna musteen virrata liian paljon, se nimittäin tulee "vuotamaan" ja leviämään ja aiheuttamaan epätasaiset reunat. Tämän jälkeen poista muovitasku ja täytä viivat, jotka puuttuvat (eli ne osat, jotka jäivät muoviliuskojen alle). Ja olet VALMIS.

When you're all done, put a card base under the plastic folder. Now, with your marker, slowly start coloring the text inside the lines. Don't let the ink flow too much, it will "bleed" and spread and create blurry lines. After this part remove the folder and fill in the lines that are missing (the places that were under the strips that kept the inner pieces of plastic in place). And you are DONE.
thankyou6 thankyou7
Niin helppoa. Vaatii noin 30 sekuntia per kortti ja sulla on mielettömän helpot ja kauniit kortit, jotka eivät maksaneet lähestulkoon mitään.

So easy. Takes about 30 seconds per card and you have these incredibly easy and pretty cards that didn't cost you almost anything. 

2014/07/22

♣ Details make the difference

Kolme faktaa minusta:
#1: On hyvin mahdollista, että olette huomanneet, kuinka tykkään koristella oikeastaan kaikkea. Edes shampanjapullot, aurinkolasit tai korvikset eivät selviä seurassani paria päivää pidempään ilman glitterikerrosta tai uutta väriä. Pienet yksityiskohdat tekevät kaikesta paremman.
#2: Rakastan myös järjestää juhlia. Rakastan väriteeman valitsemista ja siinä pysymisen yrittämistä niin hyvin kuin mahdollista.
#3: Vihaan käyttää paljon rahaa ja yritän aina löytää halvan tavan kaikkeen.

Three facts about me:
#1: It is highly possible that you have noticed how I like to decorate pretty much everything. Not even champagne bottles, sunglasses or earrings survive more than a few days in my presence without getting a coat of glitter or new color. Small details make everything better.
#2: I also love throwing parties. I love picking out the color theme and trying to stick to it as well as possible. 
#3: I hate to spend lots of money and I'm always trying to find a cheap way of doing everything.
marble5
On siis itsestäänselvää, että kaikissa bileissä, jotka järjestän, on hienovarainen väriteema - jos väriteema on punainen, en osta punaisia tuoleja, lautasia ja ilmapalloja, vaan teen punaisia cocktaileja ja ostan punaisia kukkia ja lautasliinoja. Siten juttu pysyy tarpeeksi simppelinä ja maksaa minulle - no, lähemmäs ei mitään.

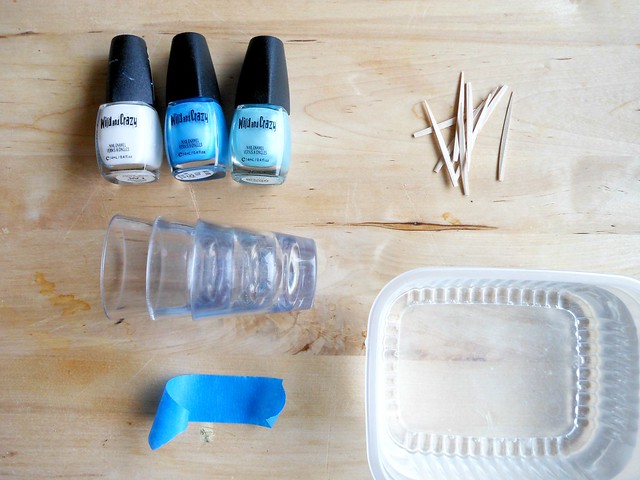
Loin tämän siistin tavan pysytellä väriteemassa pari viikkoa sitten. Tämä tapa on täydellinen juhliin, sillä koristelu on tehty kynsilakoilla. Okei okei, neljäs fakta musta: koristelen kaiken pakonomaisesti kynsilakoilla, koska pääsen koristeista siten eroon koska vain haluan. Kaikki, mitä tarvitsetkin tätä pikkuista projektia varten ovat pieni rasia ja vettä, hammastikkuja, kynsilakkoja, teippiä ja shottilaseja.

So it is clear that every party I throw has a certain, subtle color theme - if the color theme is red, I don't buy red chairs, plates and balloons, I make red cocktails and buy red flowers and red napkins. That way it is subtle enough and costs me - well, pretty close to nothing.

I created this cool way to stay in the color theme a few weeks back. It is prefect for parties since the decoration is made with nail polish. Okay okay, a fourth fact about me: I am obsessed with decorating with nail polishes because I can get rid of it whenever I want. Everything you will need for this tiny project is a small container and water, toothpicks, nail polishes, tape and shot glasses.
marble2
Lyhyesti idea on vesimarmoroida shottilasien pohjat - ja kyllä, voit tehdä saman myös normaaleille juomalaseille, kynttiläkupeille tai maljakoille, periaatteessa minkä vain tahdot koristella. Vesimarmorointi on superyksinkertaista kun vain ymmärrät sen, enkä mä ole kovin hyvä yksityiskohtaisessa selittämisessä, joten suosittelen siirtymään youtubeen ja etsimään helpon vesimarmorointitutoriaalin sieltä. Usko pois, se on helppoa. Älä pelkää.

Briefly the idea of this project is to water marble the bottoms of shot glasses - and yes, you can do this to normal drinking glasses, candle holders or vases, basically anything you want to decorate. Water marbling is super easy once you understand it, and I'm not very good at detailed explaining, so I recommend going to youtube and finding an easy water marbling tutorial there. Believe me, it is easy. Don't be scared.
marble3
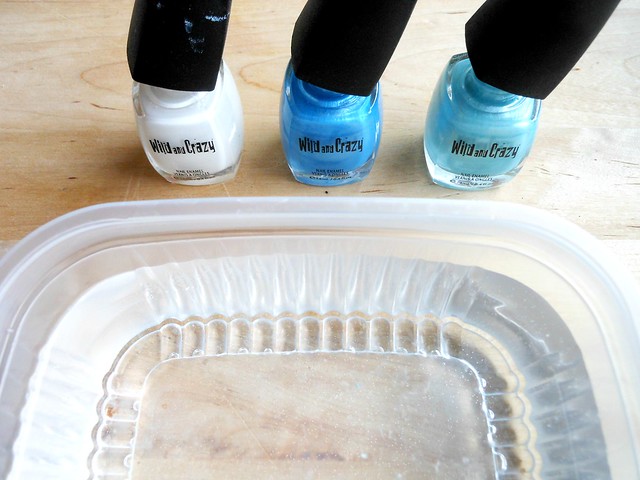
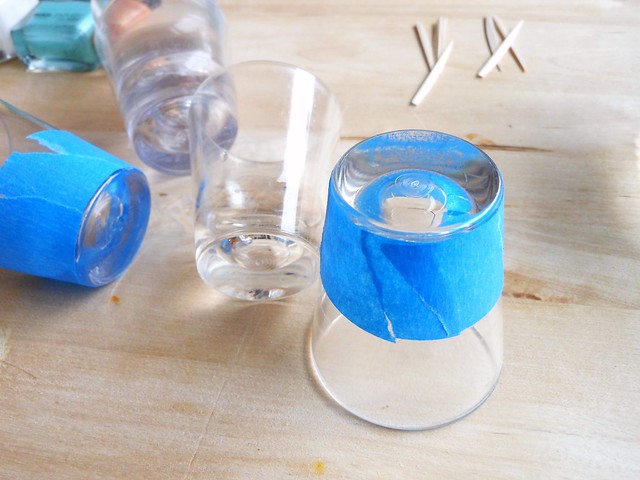
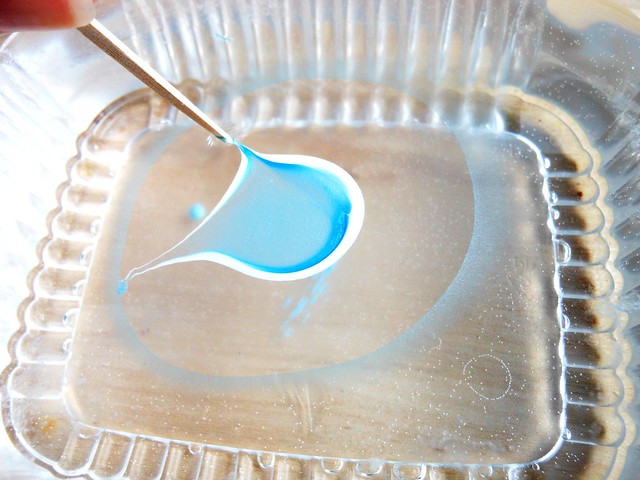
Kun olet saanut otteen vesimarmoroinnin perusjutuista, teippaa shottilasien reunat niin, että vain pohja on paljas. Tiputa sitten pisaroita kynsilakkaan rasialliseen kylmää vettä ja muotoile abstrakti kuvio hammastikulla - muista vain toimia nopeasti, sillä kynsilakka asettuu aika pian.

When you've got the hang of water marbling, tape the sides of shot glasses so that only the bottom is showing. Then drop drops of nail polish into the container of cold water and style your abstract design with a toothpick - remember to make it quick, the nail polish sets quite fast.
marble1 marble4
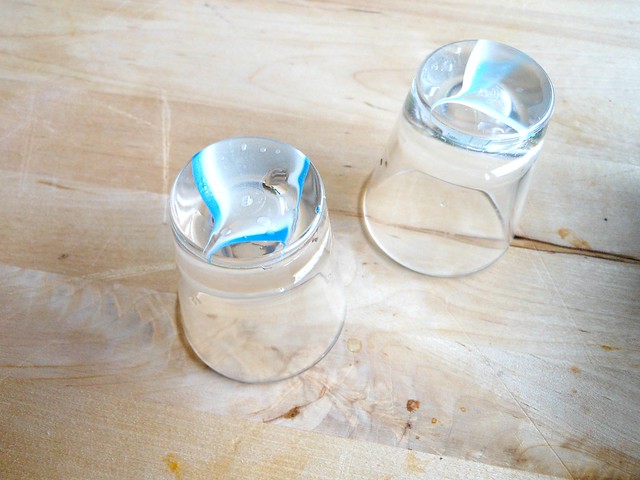
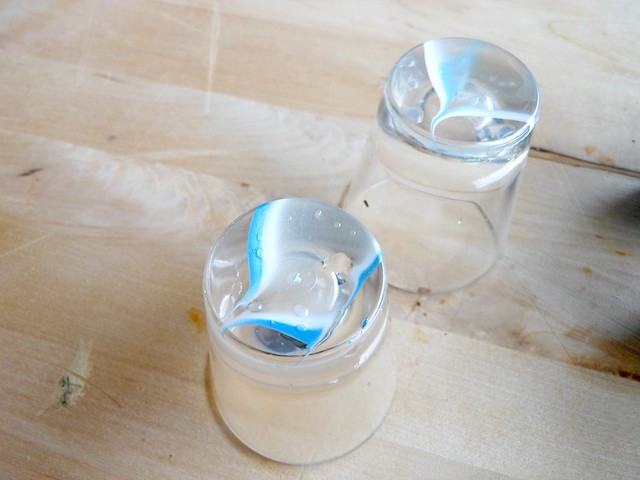
Hammastikulla leikkimisen jälkeen dippaa hitaasti shottilasi veteen ja kerää ylijäämäkynsilakka ympäriltä hammastikulla. (Ihan oikeasti, katsokaa youtubetutoriaali, edes mä en ymmärrä tästä selityksestä mitään, vaikka vähintään mun pitäisi). Sen jälkeen nosta shottilasi vedestä ja aseta kuivumaan. Kuivumisen jälkeen poista teipit ja oletkin valmis!

After playing with the toothpick slowly dip the shot glass into the water and gather the excess nail polish with a toothpick. (Seriously, watch a youtube tutorial, even I don't understand this explanation and I'm the one who should at least). Now raise the shot glass from the water and set to dry. When it has dried, remove the tapes and you're all done!
marble6
Mikä lopulta yllätti minut eniten positiivisesti oli se, että nämä shottilasit päätyivät astianpesukoneeseen vahingossa. Ja uskokaa tai älkää, mutta kynsilakkakerros säilyi moitteettomasti! Eli kyllä, voit pestä nämä ja kun haluat kuviosta eroon, pyyhi se vain pois kynsilakanpoistoaineella. 

Siinäpä se, superhelppo tapa pysyä väriteemassa lähes kokonaan ilman rahaa tai vaivaa.

Now, what surprised me positively was that these shot glasses accidentally ended up in the dishwasher and believe it or not, the coat of nail polish survived impeccably. So yes, you can wash these and when you want to get rid of the decoration, just wipe it off with nail polish remover.

There, a super easy way of staying in the color theme with almost no money or trouble at all.

2014/06/12

♣ Glitter makes everything better

Mä oon sellainen ihminen, joka tykkää koristella kaikkea. Esimerkiksi järjestäessäni ylioppilasjuhliani olin superinnoissani koristelemassa jopa shampanjapullot glitterillä, mutta kaikki ajattelivat, että se oli liikaa, joten jouduin jättämään pullot koskemattomiksi. Liikaa? Ei mun mielestä koskaan voi olla liikaa glitteriä.

Mutta mun täytyi saada jotain kimaltamaan ja koska juhlissa on aina kakku, ajattelin, että siinä olisi loistava asia laittaa kimaltamaan. Tai no, ei kakku itsessään, vaan jotain sen päällä - kakun päällä oleva koriste eli cake topper! Tässä selostettuna miten niitä voi tehdä helposti:

I'm the kind of person who likes to decorate everything. For example, when I was planning my graduation party, I was thrilled to decorate the champagne bottles with glitter, but everyone thought it was too much so I had to leave it undone. Too much? I don't think there can ever be too much glitter.

So I had to make something sparkle and since parties always include a cake, I thought that would be a great thing for me to make sparkle. Well, not the cake itself, but something on top of it - cake toppers! Here's how they're done the easy way:
toppr1
1. Kirjoita teksti koneella kivalla fontilla ja varmista, että kaikki kirjaimet koskettavat toisiaan. // Write a text on your computer in a nice font and make sure that every letter touches each other.
2. Tulosta teksti // Print your text out
3. Liimaa paperi pahvinpalan päälle // Glue it on a piece of cardboard
4. Leikkaa // Cut
5. Sivele liimaa päälle // Brush glue on top
6. Ripottele glitteriä // Sprinkle with glitter
7. Kiinnitä cocktailtikut takapuolelle liimalla tai teipillä // Attach two cocktail sticks to the backside with glue or tape
toppr3 toppr2 Mä tein kolmet erilaiset cake topperit - yhden jossa lukee "congrats", yhden jossa lukee "hurraa!" sekä kolme erillistä, jotka muodostavat lauseen "se on ohi". Ja ne on aivan äärettömän suloisia ja kaikki mun ylppäreissä rakastivat niitä!

I made three kinds of cake toppers - one that says "congrats", one that says "hurraa!" (=hooray!) and three separate ones that form the sentence "Se on ohi" (=it's over). And they are absolutely adorable and everyone at my graduation party loved them!
toppr4

2014/01/28

♣ DIYs with love

Mitä on tulossa parin viikon sisällä: ystävänpäivä! Oon oudon innoissani, suurimmaksi osaksi siksi, että päätimme parhaan kaverini kanssa järjestää ystävänpäivän bileet. Oon tehnyt erilaisia DIY-juttuja siitä lähtien ja tässä on niitä tuotoksia, joita saatte nähdä tarkemmin seuraavan parin viikon sisällä ennen ystävänpäivää!

What's coming up in a couple of weeks: Valentine's day! I'm oddly excited, mostly because I and my best friend decided to throw a Valentine's party. I've been doing different DIYs ever since and here are some of the DIYs you'll be seeing in the next couple of weeks before Valentine's day!
valentinesZZZ1