2014/12/19

♣ Last minute wishes

Joulun vaikein osuus on ehdottomasti se, kun lahjoja pitää antaa ihmisille, joita ei oikein tunne. Mä keksin tosi iisisti lahjoja läheisille, ratkaisen niiden ongelmia ja kettuilen vanhoista jutuista ja teen juttuja joita tiedän niiden tarvitsevan. Mutta mitä antaa isän kihlatulle, poikaystävän isovanhemmille, työkavereille, siskopuolen velipuolelle tai kaukaiselle kummitädille? 

No tämän. 

The hardest part of Christmas is, without a doubt, coming up with gift ideas for people you don't really know. It's pretty easy for me to come up with ideas for family and friends, but what should you give your dad's fiancée, boyfriend's grandparents, coworkers, stepsister's stepbrother or a remote godmother?

Well, this.
merry1
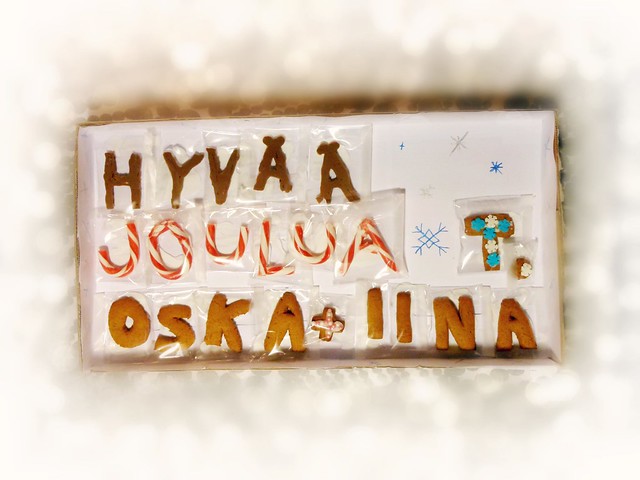
Mahdollisesti helpoin ratkaisu lahjaongelmaan! Paketoidut konvehtirasiat ovat omasta mielestäni hyvin todennäköisesti typerin lahja ikinä, vaikka kukapa suklaasta ei tykkäisi, mutta kun suklaan muotoilee uudestaan, katkoo ja taivuttelee karkkikeppejä ja leipoo parit piparit, saa vähällä vaivannäöllä tehtyä persoonallisen ja helpon lahjan ihan kenelle tahansa. 

Koska projekti tehtiin ihan viimetippaan keskiyöllä, jolloin valosta, varsinkaan luonnonvalosta, ei ollut merkkiäkään, oli pakko jättää vaihekuvat ottamatta. Tässäpä siis listattuna parit vinkit, miten saat kivan lopputuloksen.

* Sulata ja temperoi suklaa. Piirrä leivinpaperiin kirjaimet ja sitten valuta suklaa pursotuspussilla luonnoskirjaimien sisälle, niin saat symmetriset kirjaimet ja tasaiset reunat. 
* Heitä karkkikepit hetkeksi uuniin, ne pehmenevät sen verran, että niitä voi taivuttaa!
* Taittele sellofaanista pikkuisia pusseja, joihin ujutat kaikki kirjaimet
* Vuoraa leveä pahvilaatikko valkoisella paperilla
* Liimaa / teippaa sellofaanipussit paketin pohjaan, jotta ne eivät irtoile ja vaihda paikkoja

Possibly the easiest way to solve this problem! I think store-bought chocolate is the dumbest gift ever, though who doesn't like chocolate, but when you melt chocolate into a new form, cut and bend candy canes and bake a batch of gingerbread, you can get this personal and easy gift for anyone only with a little effort.

This project was made in the last minute in the middle of the night, so I didn't have a chance when it came to taking pictures of each step. So I'll just make a list of useful tips that will help you get the result you want.

* Melt and temper the chocolate. Draw letters on parchment paper and then re-write the letters with a piping bag filled with chocolate. This is how you'll get each letter the same size.
* Put your candy canes in the oven for some time, they'll soften so you can bend them!
* Fold little bags from cellophane and put each letter in a cellophane bag
* Cover a wide box with white paper
* Glue or tape the cellophane bags to the bottom of the box so they won't separate or change places

PS. My letters spell "Hyvää Joulua t. Oska + Iina", it's Finnish and means "Merry Christmas, love: me and my boyfriend's names"

2014/11/13

♣ Broquet

Mun faijalla oli synttärit vähän aikaa sitten, ja kun kysyin häneltä, mitä hän haluaisi lahjaksi, vastaus oli kylmä "en yhtään mitään." Syy löytyi siitä, että faijan mielestä hänestä oli nyt tullut niin vanha, ettei hänen synttäreitä olisi syytä enää juhlia laisinkaan. Aluksi halusin arvostaa hänen synttäritoivettaan, mutta lopulta tajusin, että vaikka hän ei lahjoja haluaisikaan, ainahan synttärisankarille voi kukkia antaa, eikö? Faija sanoi "toki". Eli vihreä valo annettu, jes.

Onneks mä oon paljon ovelampi kuin uskoisikaan.

My Dad had his birthday a little while ago, and when I asked him what he wanted to receive as a gift he answered: "absolutely nothing." The reason was that the thought he was getting so old that his birthday shouldn't be celebrated anymore. At first I wanted to respect his birthday wish, but lastly I realized that even though he doesn't want gifts, you can still receive flowers on your birthday, right? He said "yeah, sure". Green light. Yes.

Luckily I'm sneakier than that. 
bro2
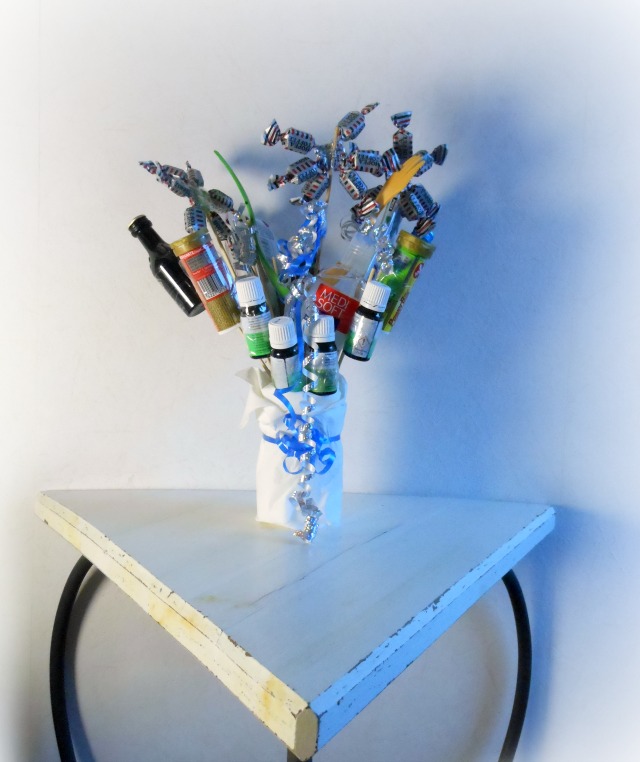
Oon varma, että monet teistä on tuttuja termin broquet kanssa, eli yleensä miehille tehtyjen kukkakimppujen, miehet kun ei yleensä kukista hirveästi välitä. Kimppu on yleensä täytetty lahjakorteilla, raaputusarvoilla, limsalla ja tupakalla tai alkoholilla. En tehnyt mitään eri tavalla - halusin vain näyttää oman versioni broquetista ja jakaa pari vinkkiä samalla.

Yleensä broquetit kasataan lasimaljakkoon tai oluttuoppiin, mutta mä käytin niin paljon rahaa jo "kukkiin" yksinään, etten millään viittinyt ostaa kallista lasimaljakkoa, jota faija tuskin koskaan edes käyttäisi. Tämän takia palkitsin itseni Pepsitölkillä, juotuani sen pesin sen ja leikkasin irti koko päällimmäisen osan. Varmista, ettei reunoille jää teräviä osia (jos jää, niin taivuta ne tölkkiä vasten pihdeillä) ja täytä tölkki styroksilla tai muulla pakkausmateriaalilla.

I bet many of you are familiar with broquets, bouqets made usually for males since they don't really care about flowers. The bouqet is usually filled with gift cards, scratchcards, candy, soda and cigarettes or alcohol. I did nothing different here - just wanted to show you my version of a broquet and share a few tips as well.

Usually broquets are assembled in a glass vase or a beer pint, however I spent so much money on the "flowers" alone that I really didn't want to buy an expensive glass vase that my Dad wouldn't probably ever even use. That's why I rewarded myself with a can of Pepsi and after I'd drank it, I washed it and cut out the entire top part. Make sure there's no sharp edges left on the can (if there are, just bend them in the opposite direction with pliers) and stuff the can with styrofoam or other packaging material. 
bro3
Seuraavaksi sun pitäisi löytää itsellesi pitkiä, puisia grillitikkuja, teippiä sekä tottakai tavarat kimppua varten. Käytä ihan naurettava määrä teippiä varmistaaksesi, että jokainen tavara pysyy juuri siinä, missä niiden pitäisikin pysyä.

Ja nyt, nyt on aika uhmata painovoimaa. Aluksi saa päähäsi edes jonkinlainen käsitys siitä, millaiseen järjestykseen tuotteet haluat kimppuun, ja sitten vain ala tökkimään niitä paikoilleen. Varmista, että paino on jakautunut tasaisesti jokaiseen suuntaan (mun tapauksessa paino oli aina hieman takana, ette voi edes kuvitella, kuinka monta kertaa koko juttu kaatui ja jouduin kasaamaan kaiken uudestaan). Ja nyt oletkin valmis!

Next you should get yourself some long wooden barbecue sticks, tape and, of course, the items for your broquet. Use a ridiculous amount of tape to ensure that each and every item stays where it should stay.

Now it's time to defy gravity. First have an idea in your head about the way you want the items to be located in the bouqet, and then just start poking them into place. Make sure the weight is equally on each side (mine had most of its weight always on the back, you cannot even imagine how many times it fell and I had to reorganize the whole bouqet). And... You're all done!
bro1
Noh, tää projektihan näyttää helpolta, mutta se on aivan kaikkea muuta. Mä käytin kokonaisen teippirullan ja silti kevyimmätkin tavarat, kuten proteiinipatukat, valuvat aina grillitikkua pitkin. Loppujen lopuksi, sä tosiaan taistelet painovoimaa vastaan teipin voimin. Eikä se edes ole vaikein osuus - vaikein osuus on epäilemättä koko kimpun sanomalehteen kääriminen. Joka tapauksessa uskon, että pääsin ihan hyvään lopputulokseen ja tiedän kyllä, että faija tulee olemaan sekä iloinen että yllättynyt.

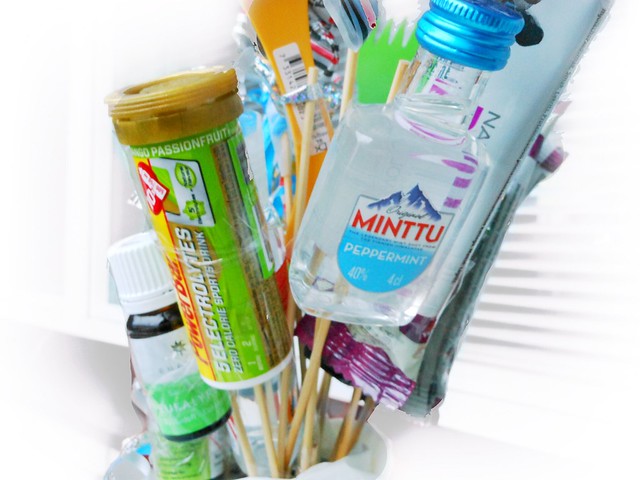
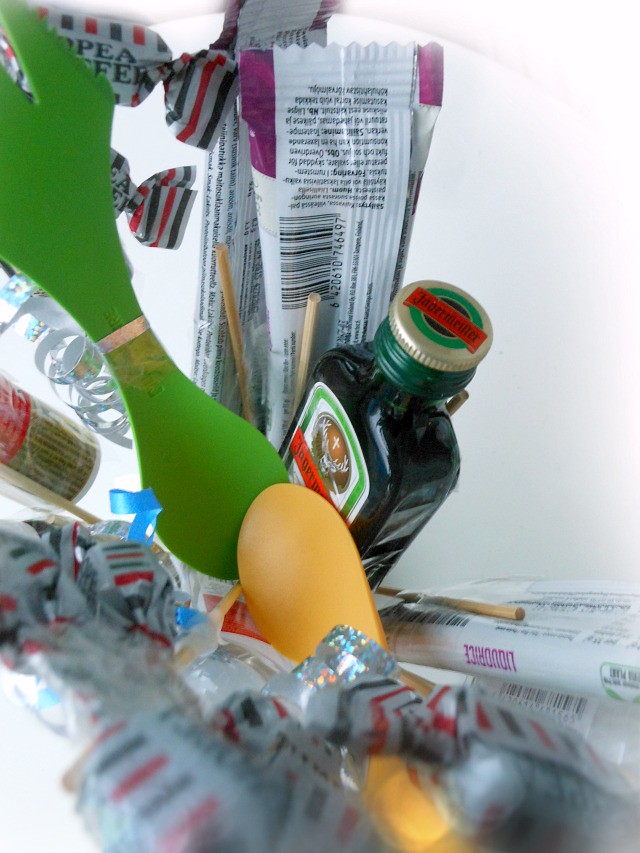
Niin, ja vielä loppuun lista asioista, joita mä käytin "kukkina" matkustelua, telttailua, saunaa, liikuntaa, hopeatoffeeta, lakritsia ja alkoholia rakastavan isäni kukkakimpussa: kalorittomia palautumisjuomia, kolme miniviinapulloa, kaks sporkia, matkakokoinen käsidesi, kolme kukkaa tehtynä hopeatoffeista, neljä pulloa saunatuoksuja sekä lakritsinmakuisia proteiinipatukoita.
Now, this project does look easy, but it's everything other than that. I used a whole roll of tape and still even the lightest items like protein bars keep sliding down the barbecue stick. After all, you are fighting against gravity with tape. And that's not even the hardest part - the hardest part is wrapping the whole thing in newspaper. Anyway, I think I did good and I know my Dad will be surprised and glad. 

Oh, and my list of things I used as flowers for my Dad who loves sauna, excercise, this candy called silver taffy, liquorice, liquor, traveling and camping: non-calorie recovery drinks, three mini bottles of liquor, two sporks, a travel-size hand sanitizer, three flowers made from silver taffy, four bottles of sauna scents and three liquorice flavored protein bars.

2014/09/03

♣ I am thankful.

Musta ei oo olemassa mitään tylsempää kuin kaupasta ostetut kortit, joten mä teen kortit itse jokaiseen tapahtumaan. Kuitenkin työnteon yllättää usein pieni ongelma: jos lähettelen kortteja useammille ihmisille, korttien täytyy olla identtiset ja sitä on aika vaikea saavuttaa käsin. Tai, no... oli vaikea saavuttaa, kunnes keksin tämän.

Tässä postauksessa näytän teille, miten lisätä identtistä tekstiä kortteihin ilman maalia, leimoja, tulostinta tai mitään kallista. Kaikki mitä tätä varten tarvitset ovat tussi (mä käytin kultaista), pala muovia (muovitasku sopii hyvin ja sellainen löytyy varmasti jokaisen kotoa), mattopuukko sekä nättejä korttipohjia.

I think there is absolutely nothing more boring than a store-bought card so I make cards myself for every occasion. However, usually there is one small problem: if I'm sending cards to a bunch of people, the cards have to be identical and that is slightly difficult to achieve by hand. Or... it used to be, until I came up with this idea.

In this post I'm gonna show you how to add identical text to cards without paint, stamps, a printer or anything expensive. Because everything you will need is a marker (I chose gold), a piece of plastic (a plastic folder will do the trick and that's probably something you already have at home), a box cutter and some pretty card bases.
thankyou1
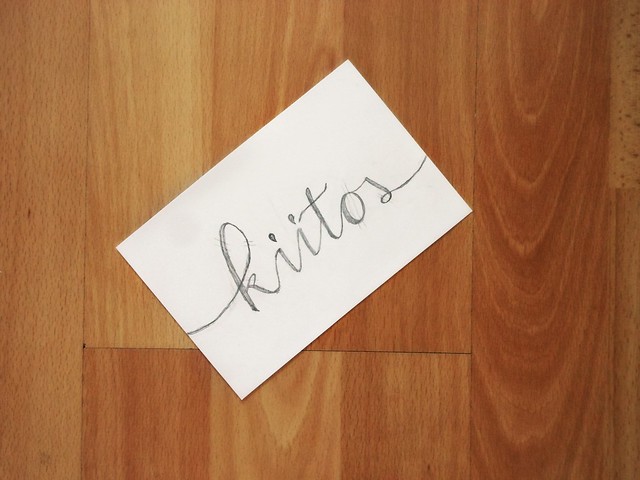
Ensimmäisenä luonnostele teksti paperille. Varmista, että sisäosat kirjaimista, kuten a, e, o ja p pysyvät paikoillaan pikkuliuskoilla muovia, jotka jätät leikkaamatta.

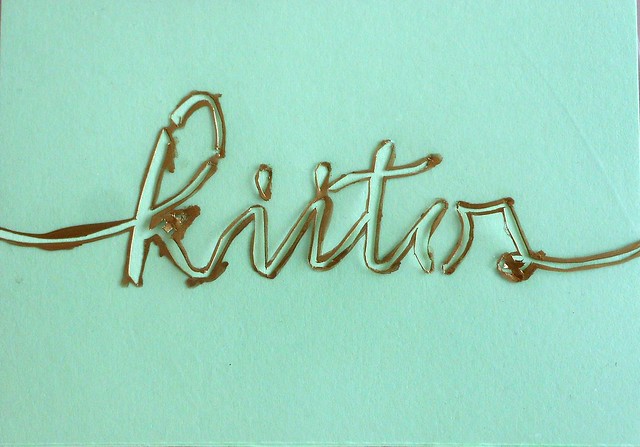
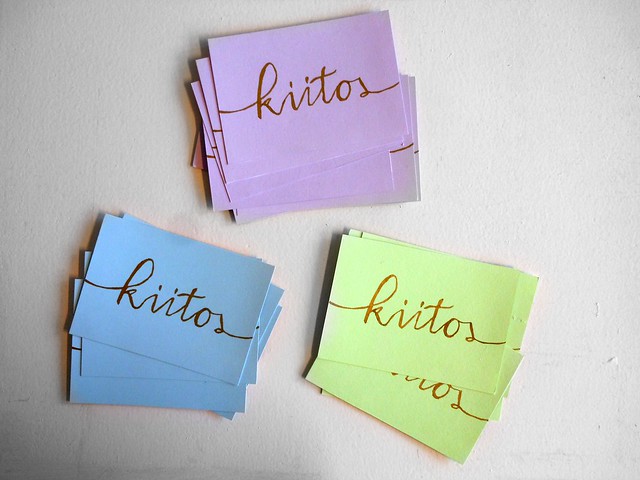
First sketch your text on a piece of paper. Make sure the inner pieces of letters like a, e, o and p have a string of plastic that holds them in place. I made thank you cards, so my text was "kiitos" (thank you in Finnish).
thankyou2
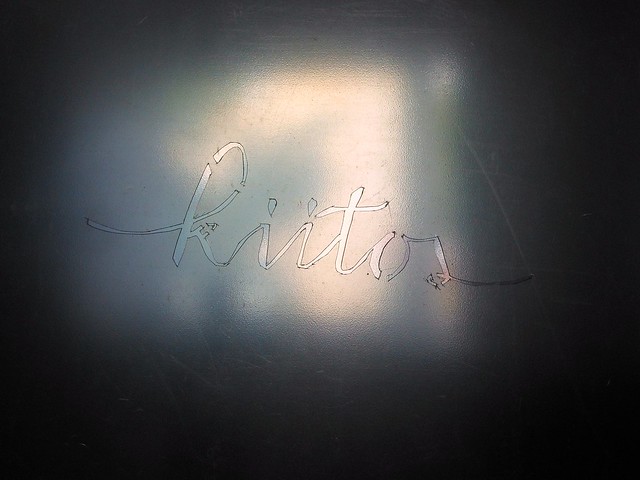
Aseta muovitasku luonnoskortin päälle ja leikkaa mattopuukolla luonnosviivoja pitkin.

Place a plastic folder on top of the sketch card and with a box cutter cut along the lines you've drawn.
thankyou3
Kun tämä on valmista, laita korttipohja muovitaskun alle. Ala nyt hitaasti värittämään tekstiä viivojen sisäpuolelta tussilla. Älä anna musteen virrata liian paljon, se nimittäin tulee "vuotamaan" ja leviämään ja aiheuttamaan epätasaiset reunat. Tämän jälkeen poista muovitasku ja täytä viivat, jotka puuttuvat (eli ne osat, jotka jäivät muoviliuskojen alle). Ja olet VALMIS.

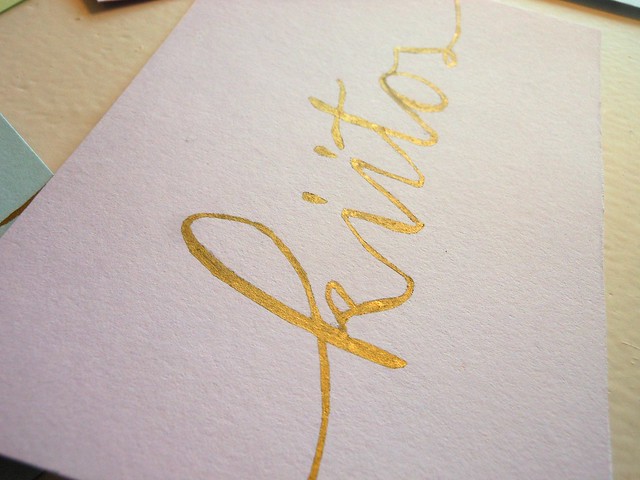
When you're all done, put a card base under the plastic folder. Now, with your marker, slowly start coloring the text inside the lines. Don't let the ink flow too much, it will "bleed" and spread and create blurry lines. After this part remove the folder and fill in the lines that are missing (the places that were under the strips that kept the inner pieces of plastic in place). And you are DONE.
thankyou6 thankyou7
Niin helppoa. Vaatii noin 30 sekuntia per kortti ja sulla on mielettömän helpot ja kauniit kortit, jotka eivät maksaneet lähestulkoon mitään.

So easy. Takes about 30 seconds per card and you have these incredibly easy and pretty cards that didn't cost you almost anything. 

2014/08/22

♣ If I were in your shoes... I'd add some DIY.

Valkoset Converset. Joo, sä rakastat niitä, mutta hitto, eiks ne oo tylsimmät kengät ikinä? Okei, okei, en mä vaan voi sanoa noin niistä kengistä - onhan ne myös ihanat ja upeat ja sopii joka asuun. Mutta kaikkien täytyy myöntää, että ne ovat vähän tylsät, siis VAIN vähän. Ovathan ne kuitenkin valkoiset. Ja vaikka ne ovat kauniit ja kaikkea, joskus mulla tulee houkutus koristella niitä hieman. Joskus taistelen houkutusta vastaan ja joskus, kuten tällä kerralla, mä häviän.

White Converse. Yes, you love them, but damn, aren't they the most boring shoes ever? Okay, okay, I can't say that about those shoes - they are lovely and they look gorgeous and go well with any outfit. But you gotta admit that they are a tad boring, JUST a tad. After all, they are white. And though they are beautiful and all, sometimes I get this urge to decorate them a little. Sometimes I fight the urge and sometimes, like this time, I lose.
cons2
Pari päivää sitten mä käytin mun tuntipalkan kirjontalankaan. Ei mun viisain siirto tähän mennessä, mutta kun näin mun uudet, päivitetyt Converset, en muuten tuntenut tippaakaan katumusta.

Eli tätä projektia varten tarvitset:
1. Sakset
2. Neulan
3. Kirjontalankaa
4. Converseparin, tai, no, minkä tahansa päivittelyä vailla olevan kenkäparin

I spent my hour salary on embroidery floss a couple days back. Not my wisest move so far, but when I saw my new, upgraded pair of Converse I felt no regret at all.

So, for this project you will need:
1. Scissors
2. A needle
3. Embroidery floss
4. A pair of Converse shoes, or, well, any shoes that call for an upgrade
cons1
cons5
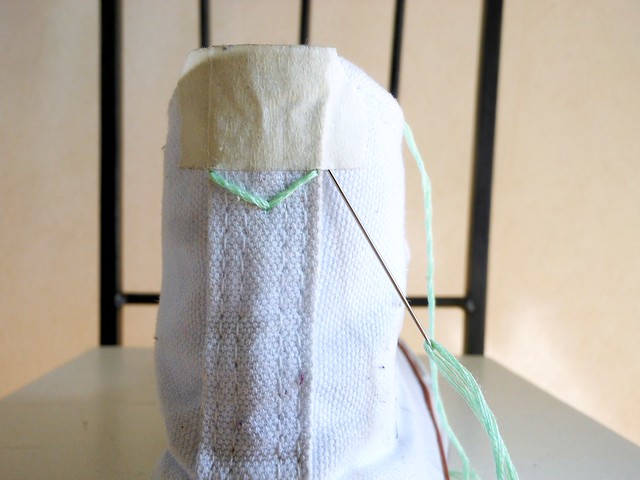
Ensimmäinen askel on suunnitella kuvio. Tee se rauhassa ja pidä mielessä vaihtoehto, että muutat kuviota aika varmasti vielä silloinkin, kun olet jo ompelemassa sitä. Niin ainakin mulle kävi.
Seuraava askel on jollakin tapaa pakottaa lanka neulansilmään. Jos käytät pikkuriikkistä neulaa kuten minä, voin vannoa, että tähän tulee menemään pieni ikuisuus.
Kolmas askel on blokkia kaikki mitä aivosi yrittävät sinulle sanoa, kuten esim. "älä tee sitä! Pilaat täydellisen hyvät kengät!" ja vain painaa neula kengän läpi. Älä huoli, kyllä se siitä.
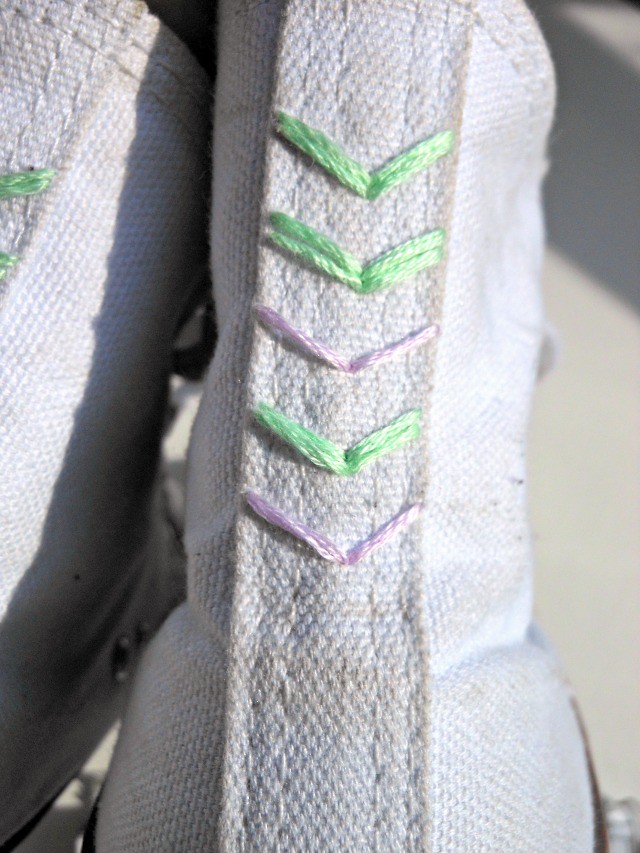
Ja lopuksi jatka niin pitkään, kunnes olet saavuttanut kuvion, josta pidät. Muista, että voit aina katkaista langat ja purkaa kaiken. Kukaan ei tule koskaan tietämään.

The first step is to create your design. Take your time and keep the option in mind that you'll probably change the design as you're already sewing. That's what happened to me, at least.
The second step is to somehow force the embroidery floss through the eye of a needle. If you're using a teeny tiny needle like me, this is gonna take time, I swear.
Step three is to block out everything your brain is trying to tell you, e.g. "don't do it! You'll ruin a beautiful pair of shoes!" and just push the needle through the shoe. Don't worry, it'll be fine.
And lastly just keep going until you have a pattern that you like. Remember that you can always just cut the thread and undo everything. No one will ever know.
cons3
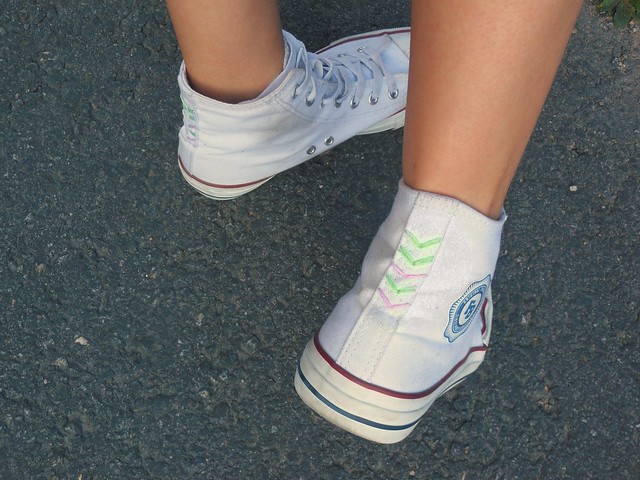
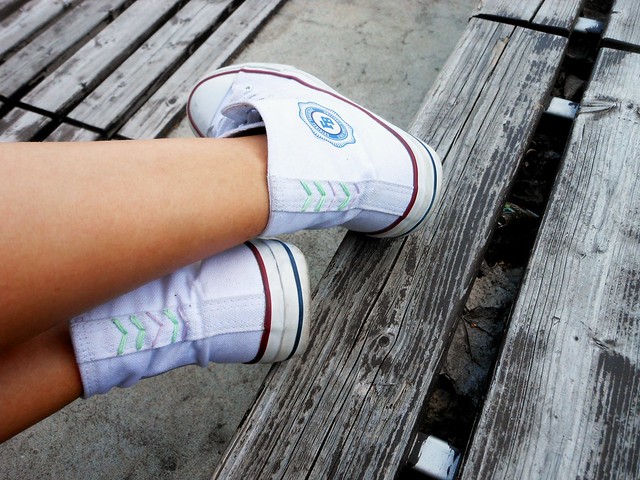
Tältä mun (15 euron feikki-) Conversepari lopulta näytti.

This is how my pair of (something that I bought for 15 euros that tries to look like) Converse turned out.
ccoconcoc2
MÄ RAKASTAN NIITÄ.
I LOVE THEM.
cons4
En voi ymmärtää miten pätkä kirjontalankaa voi piristää kenkien ulkonäköä näin paljon. Ja nyt mä haluan lisätä kaikenlaista jokaiseen Conversepariin jonka omistan - tällä hetkellä olen jotenkin innostunut neonväreistä enkä voi lopettaa miettimästä mustien converseiden ostamisesta, jotka koristelisin neonvärisellä kirjonnalla!

I cannot understand how a strip of embroidery thread can brighten a pair of shoes this much. And now I'm dying to add a little something to every pair of Converse I own - right now I'm kind of excited about neon colors and I can't stop thinking about buying a pair of black Converse and adding some neon embroidery!

2014/08/17

♣ DIY photo playing cards


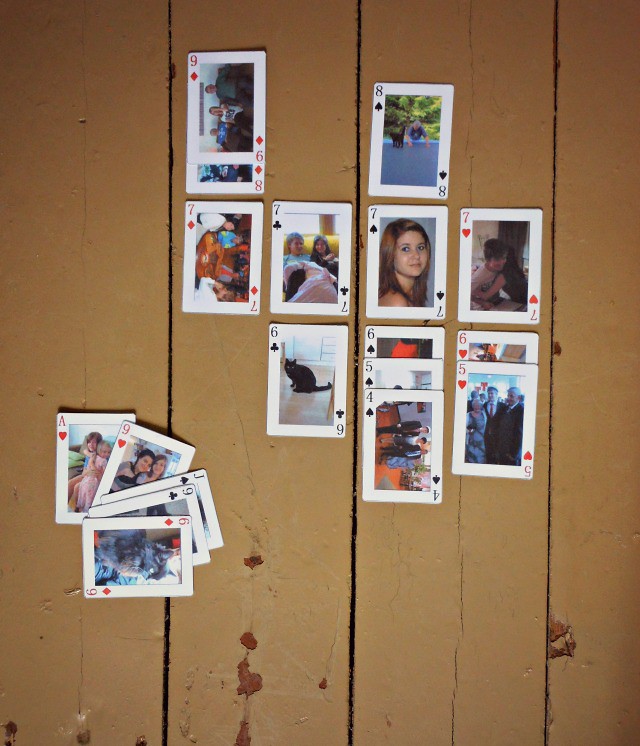
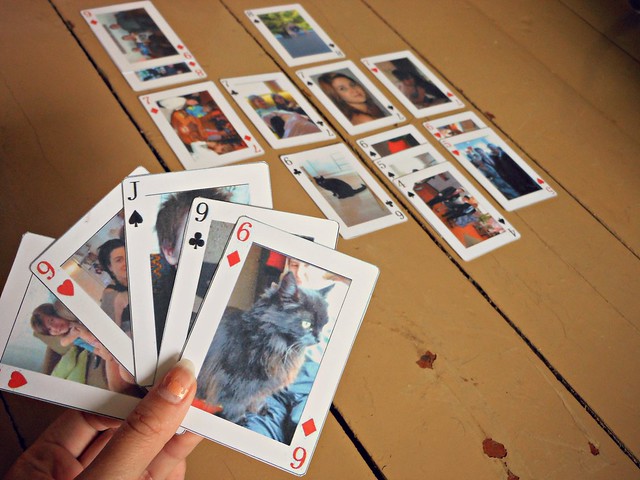
On kaksi asiaa, mitä mun isovanhemmat rakastaa: kuvia ja korttipelejä. Tein tämän lahjan heille, joka yhdisti nämä kaksi: DIY kuvallisia pelikortteja. Vaikka tein tämän isovanhemmilleni, kortit ovat täydellinen lahja kenelle tahansa: ystävänpäiväksi tee pakka täynnä kuvia sinusta ja rakkaastasi söpöillä sitaateilla, kaverin synttärilahjaksi korista pakka kuvilla hänen lempiartisteistaan ja -näyttelijöistään. Mahdollisuudet ovat rajoittamattomat ja mä vannon että kaikki rakastavat tätä lahjaa. Plus, nää on naurettaan helppoja tehdä!

There are two things my grandparents love: photos and card games. I made this gift for them that combined those two: DIY photo playing cards. Now, even though I made these for my grandparents, these make a perfect gift for anyone: for valentine's day make a deck of cards with pictures of you and your sweetheart with some cute quotes, for a friend's birthday make photo cards with pictures of their favorite singers and actors. There are limitless possibilities and I swear that everyone loves this gift. Plus, they're ridiculously easy to make!


Miten nämä tehdään: muokkaa korttipohja Paintilla (tai kopioi minun postauksen lopusta) ja kloonaa se 54 kertaa. Valitse 54 eri kuvaa ja rajaa kaikki niin, että ne mahtuvat korttien sisään ja sitten liitä aina yksi kuva yhden kortin keskelle. Sen jälkeen lisää numerot ja maat kirjoitustyökalulla ja tulosta kortit hieman normaalia tulostuspaperia paksummalle ja kiiltävämmälle paperille. Tulostuksen jälkeen leikkaa korttien reunoja pitkin ja näin käsissäsi on täydellinen, persoonallinen lahja, joka hyvin mahdollisesti maksoi sinulle ei mitään.

How to: edit a card base with Paint (or copy mine from the end of this post) and clone it 54 times. Choose 54 different pictures and crop them all so that they fit inside the card and paste the pictures in the middle of the cards. Then simply add the numbers and suits with a writing tool and print the cards on a slightly thicker, shinier paper than the usual printing paper. After printing cut along the edges of the cards and you have a perfect, personal gift that possibly cost you absolutely nothing.
poker3 poker4 Tässä pohja jota käytin, käytä sitä vapaasti myös itse! // Here's the base I used, feel free to use it yourself as well!


Tykkäsitkö, inspiroiduitko? Kerro kommentilla!
Liked them, got inspired? Write a comment!

2014/08/12

♣ Inspired by this: embroidery floss

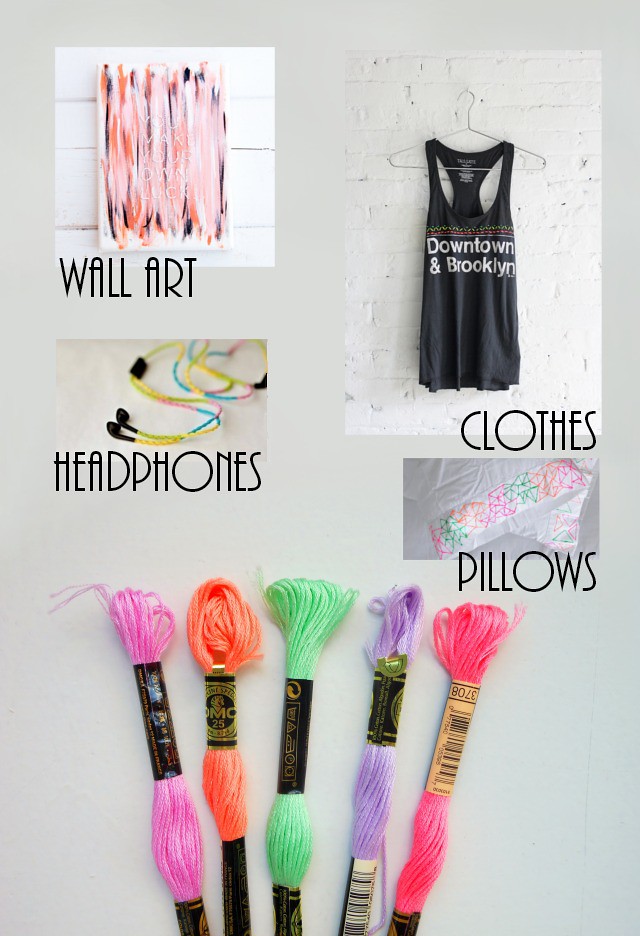
Uusi inspiraatio on saapunut. Jos nyt luulet, että olen rakastunut kirjomiseen, olet harmillisesti väärässä, sillä olen rakastunut kirjontalankaan. Kaikki ne värit, se kiiltävä ulkonäkö ja mahdollisus käyttää sitä mihin vain - niistä syistä mä tätä matskua rakastan. Tein jo yhden DIY:n kirjontalangalla ja oon aivan superinnoissani lopputuloksesta. Postailen siitä parin päivän sisään!

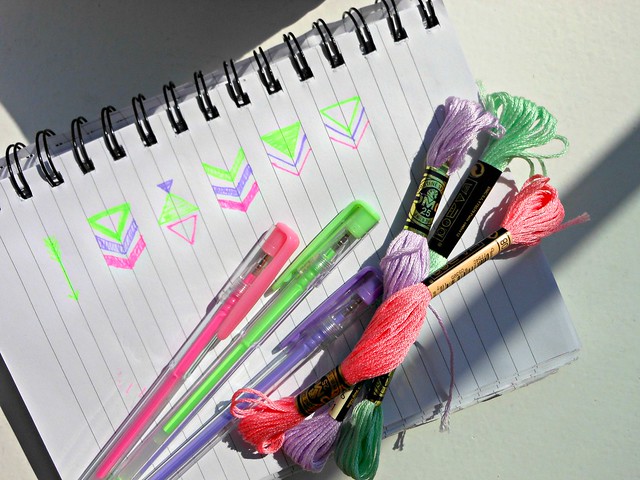
A new inspiration has arrived. Now, if you think I've fallen in love with embroidery, you're unfortunately wrong, because I am in love with embroidery floss. All the colors, the shiny appearance and the fact that you can use it for pretty much everything - that's why I love this stuff. I have already made one DIY with embroidery floss and I am thrilled with the result. I'll be posting about that in a couple days!
emb3
Photos: 1 2 3 4

2014/08/03

♣ Bubbles, berries and ice


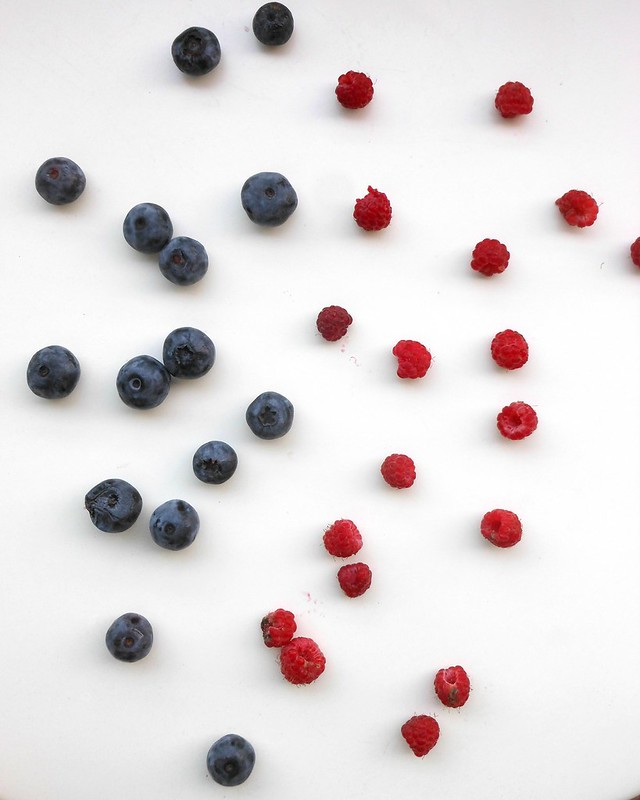
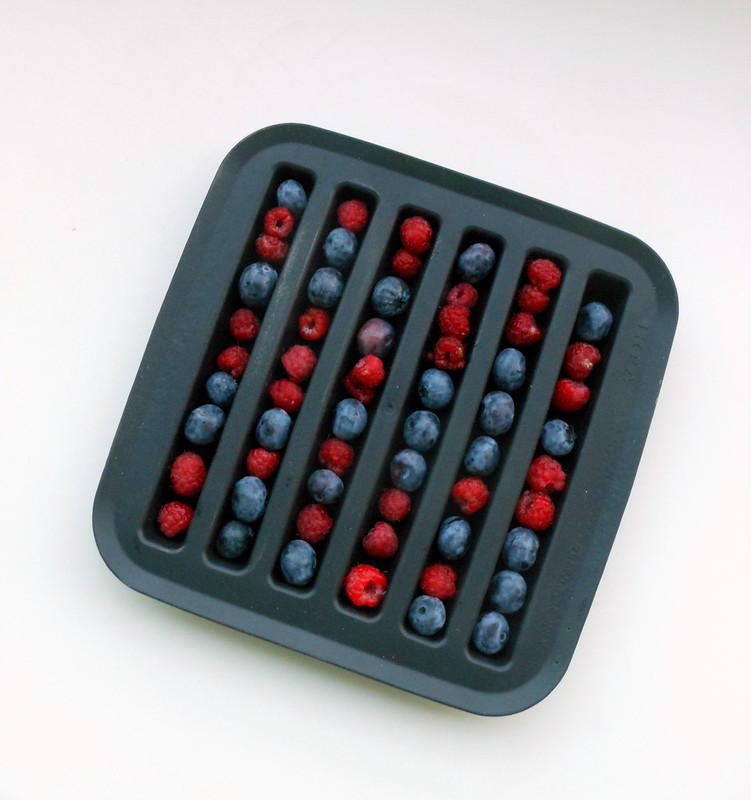
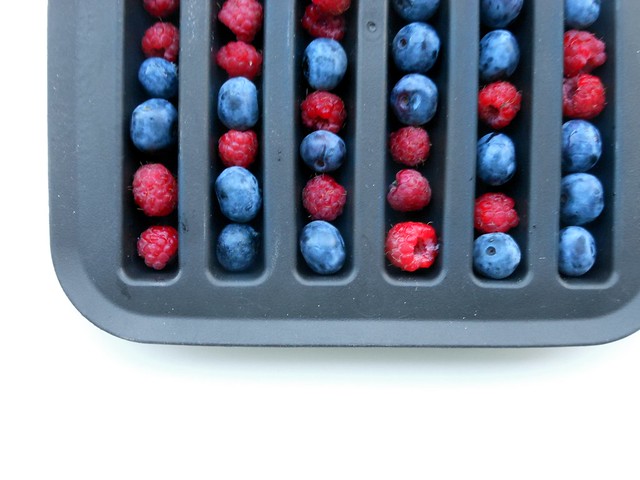
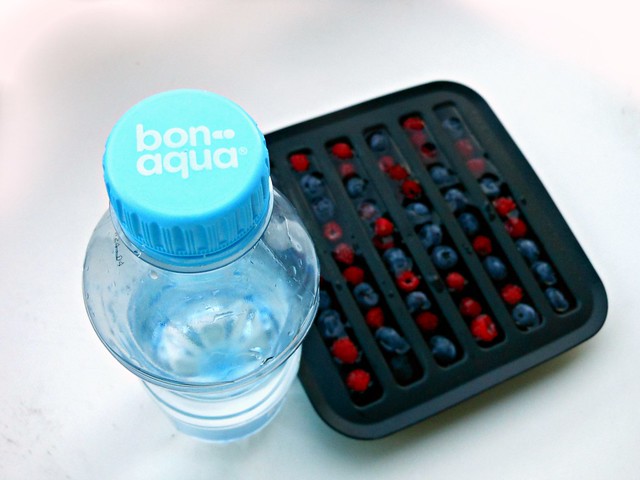
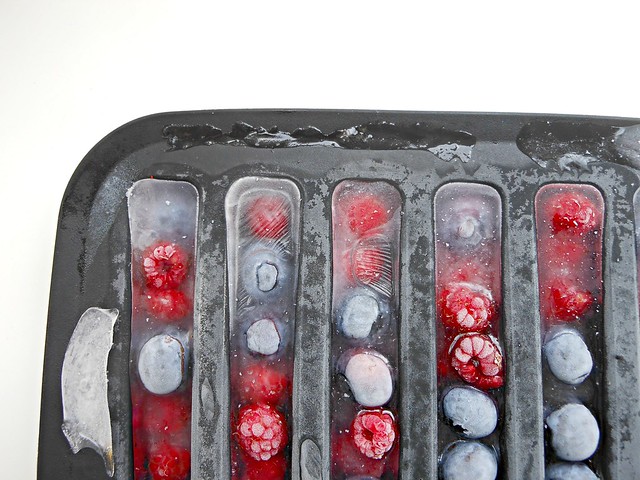
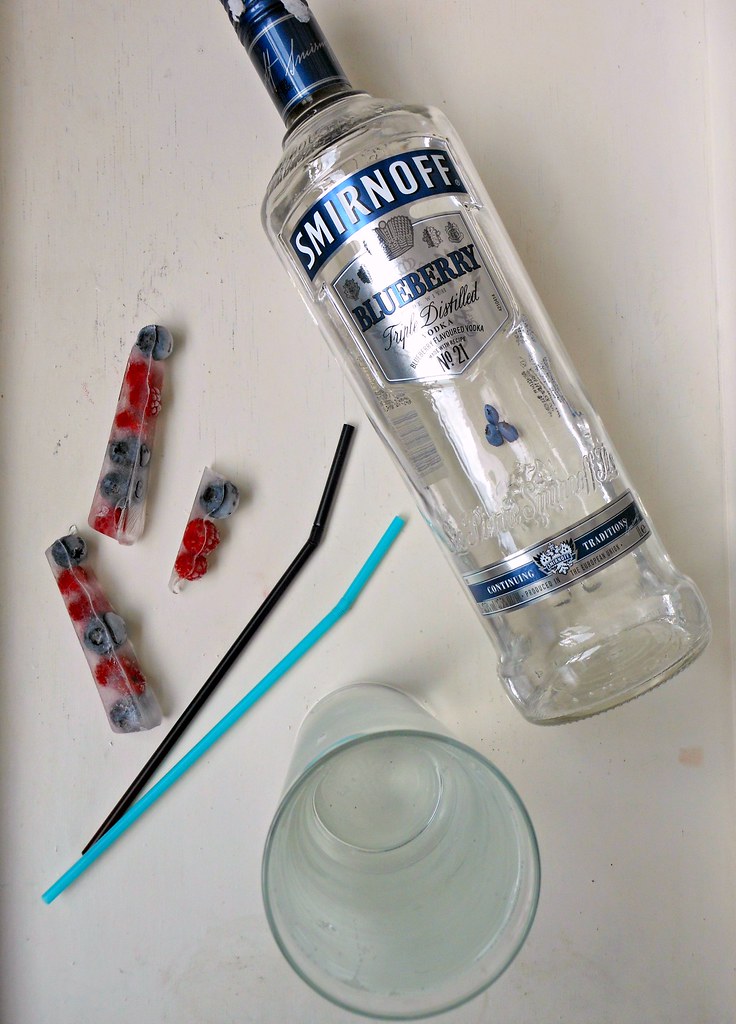
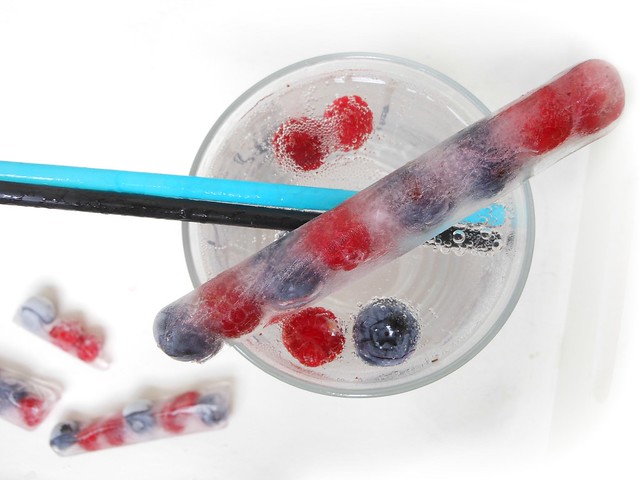
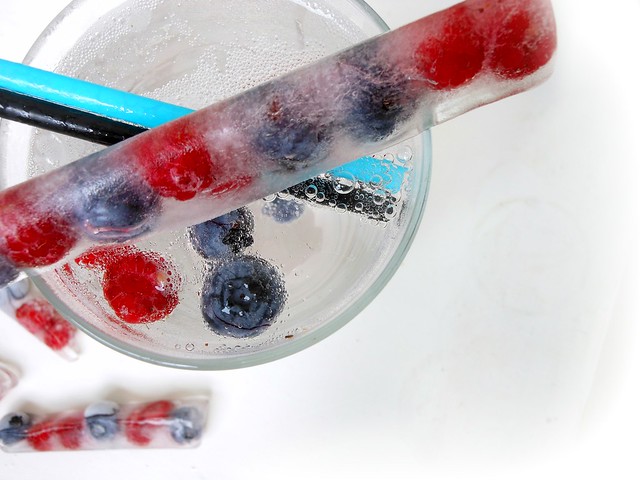
Mä työskentelen marjabisneksessä ja kiitos henkilökunta-alennuksien tuon kotiin enemmän marjoja kuin kukaan on kykeneväinen syömään. Nyt olenkin ikuisessa kiitollisuudenvelassa vanheneville marjoille, sillä ne inspiroivat - ja pakottivat - minut keksimään fiksun tavan käyttää niitä ja kiitos sen päädyin näihin: kauniisiin, herkullisiin jäihin, joita voi käyttää myös juomasekoittimina.

I work in the berry business and thanks to my employee discount I bring home berries way more than anyone can eat. Now I'm in eternal debt to expiring berries, because they inspired - and forced - me to create a clever way to use them and thanks to that I came up with this: beautiful, delicious ice that doubles as a drink stirrer.
berries1 berries2 berries3 berries5 berries6
Voisin sanoa, että tämä on helpoin DIY ikinä. Sun täytyy ainoastaan täyttää jääpalamuotti marjoilla, peittää marjat vedellä ja antaa jäätyä. Ja lopputuloksena on jotain niin nättiä, että mä vaan valokuvailin niitä aivan kikseissä puoli tuntia.

I could say that this is the easiest DIY ever. All you need to do is to fill an ice cube tray with berries, cover the berries in water and let them freeze. And the ending result is something so pretty that I honestly spent half an hour photographing the damn things. 
berries7 berries9 berries11
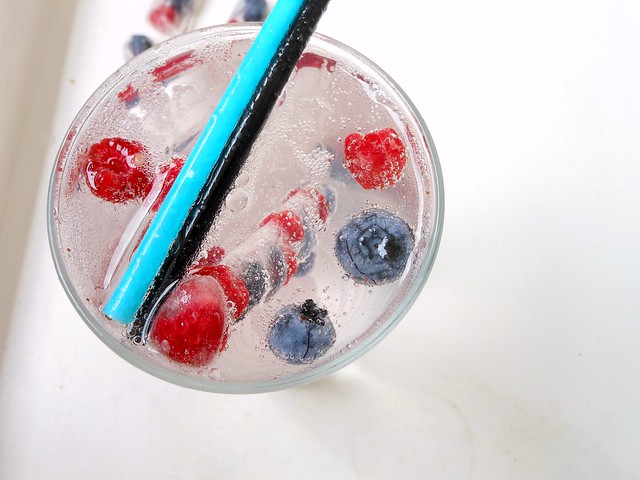
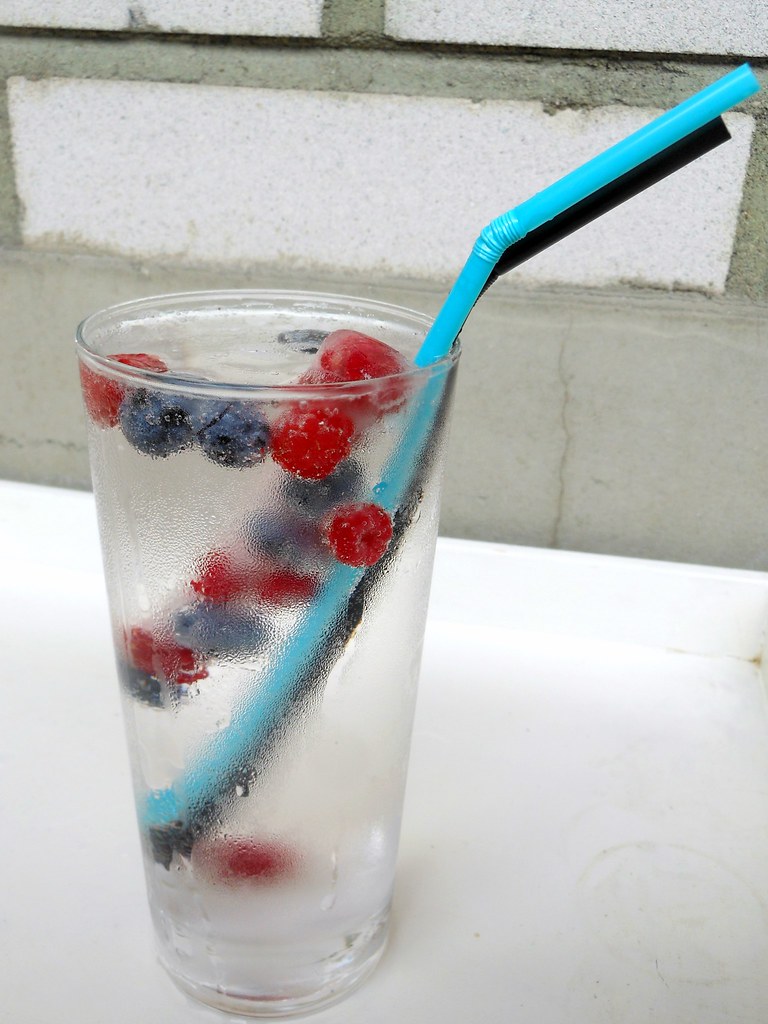
Spriten juominen ei ole koskaan ollut näin hauskaa ja vaikka marjoista liukeneekin hieman makua, koko juttu on entistä parempaa, kun sekaan kaataa hieman Smirnoff blueberryä.

Drinking Sprite has never been this much fun and though the berries release a tiny amount of flavor, the whole thing is even better when you pour in a little bit of Smirnoff blueberry.
berries12 berries10
Mä en oikeasti osaa edes kuvailla, kuinka nättejä nää mun mielestä on. Kuplia, marjoja ja jäitä, selkeesti ihan voittamaton trio.

I seriously cannot express how pretty I think these are. Bubbles, berries and ice, clearly an invincible trio. 

2014/07/31

♣ Iced caramel frappuccino

iced5
Jonkun juttu on shoppailu, toisen futis, kolmannen meditointi. Mun juttu taas on plagiointi. Vuosikausien ajan on mun keittiössä syntyneet feikkiversiot maraboun suklaalevyistä, amarillon jumalaisista annoksista, mäkkärin jälkiruoista sekä erityisesti coffarin erikoiskahveista. Mä en juo kahvia mustana, en maidolla, en kermalla enkä sokerillakaan, vaan mun kurkusta alas pääsevät vain ne kahvit, jotka tuovat mukanaan kolmesataa kaloria ja lievän diabetesriskin. Näitähän coffee house ja starbucks tarjoilevat hymysuin päivittäin, mutta koska molemmat ovat kahvista vähän budjettini yli, ei ole ongelma eikä mikään väsätä resepti, miten tehdä niitä jumalaisia kahveja itse kotona.

While other people enjoy to shop, play football or meditate, I enjoy to plagiarize. For years and years fake versions of chocolate bars, restaurant meals, McDonald's' desserts and especially Starbucks' coffees have brought into life in my kitchen. I don't drink coffee black, with sugar or with cream, I only like the coffees that include at least three hundred calories and a slight risk of diabetes. These are the coffees that Starbucks serves every day, but I find these coffees a tad too expensive for my budget - and that's exactly why I create them at home.
iced4 iced1
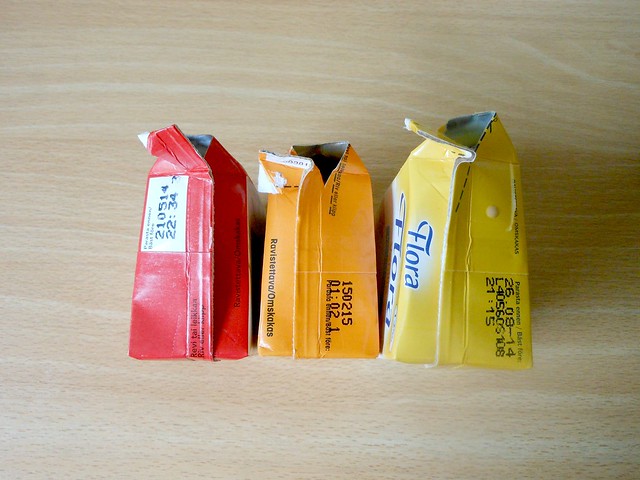
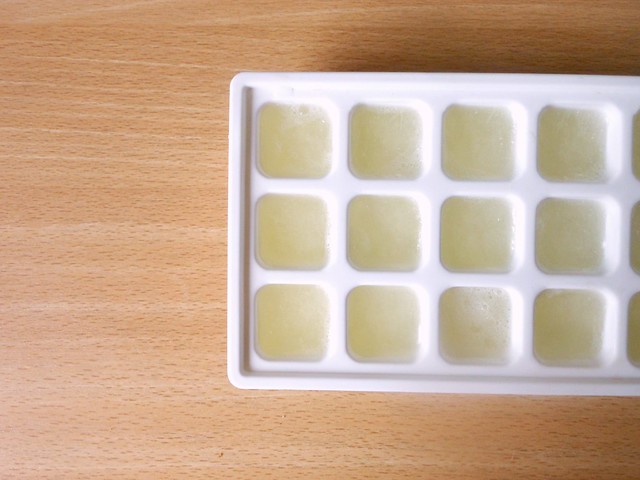
Ongelma kotonatehdyissä kahveissa on yleensä eräänlainen laihuus. Koostumus muistuttaa hyvin pitkälti normaaleita nesteitä, kun taas kahvilassa niin kylmät kuin kuumatkin juotavat ovat jollain tavalla paksumpia ja rikkaampia. Tähän ratkaisuksi kylmiin kahveihin löytyy jääpalat, muttei lainkaan vedestä - vaan maidosta.

The problem with homemade coffees is leanness. The consistency is very close to every normal liquid there is, when in cafés cold as well as hot beverages capture a smoother, richer consistency. The solution for this problem when making a cold coffee is ice cubes - but not from water, from milk.
iced3 iced2
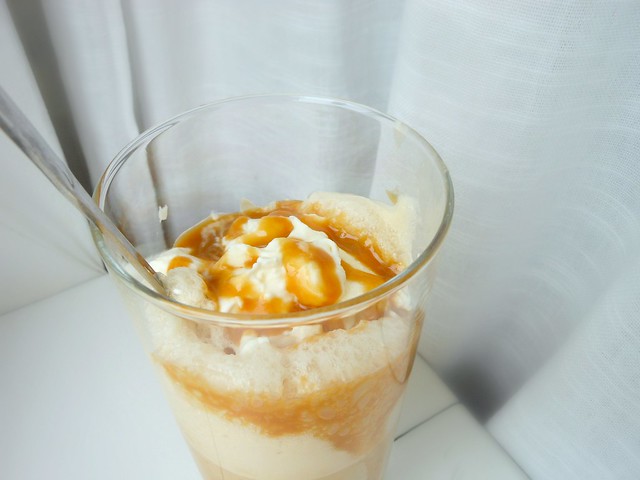
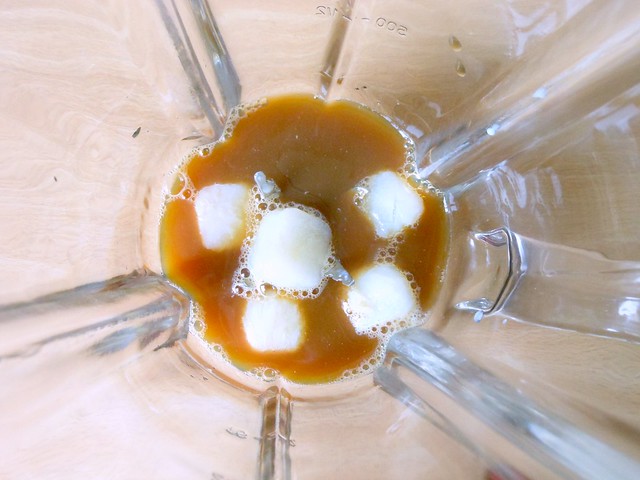
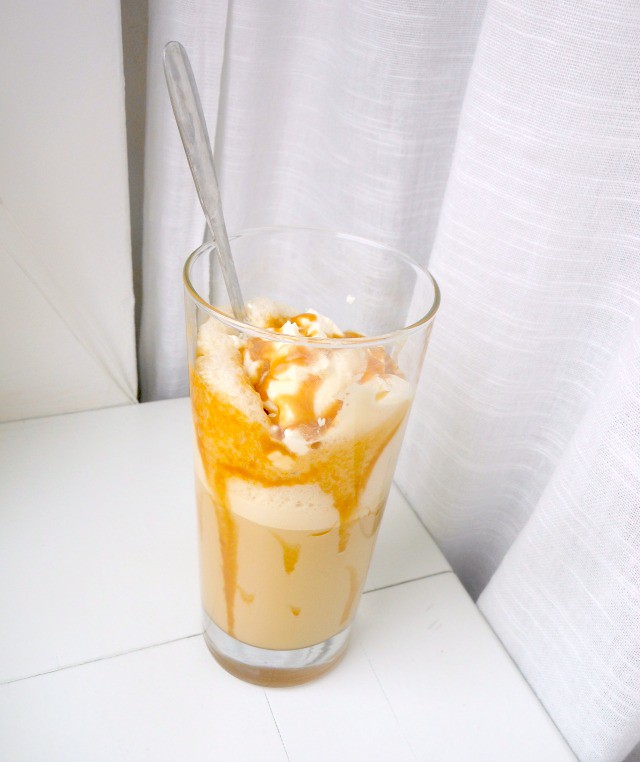
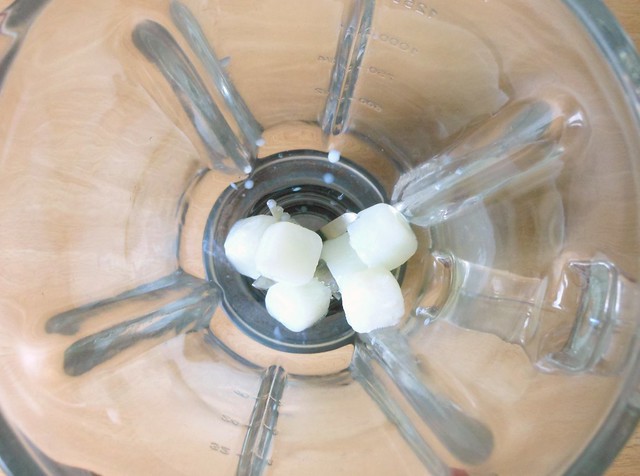
Jääkylmää karamellifrappuchinoa varten tarvitset kuusi maitojääpalaa, vähän alle puolitoista desiä kylmää kahvia, 2-3 ruokalusikallista vaniljakermaa ja 0-1 ruokalusikallisen kinuskikastiketta. Laita ainekset blenderiin ja sekoita, kunnes koostumus on tasaista. Koristelin lasin sisäreunat kinuskikastikkeella ja kahvin päällystin kermavaahdolla sekä kinuskikastikkeella.

For iced caramel frappuccino you'll need six milk ice cubes, little less than 1½ deciliters cold coffee, 2 to 3 tablespoons vanilla cream and 0-1 tablespoons caramel sauce. Put all ingredients in a blender and blend until smooth. I decorated the inside of the glass with caramel sauce and topped the drink with whipped cream and  a little caramel sauce.
iced6 VINKKI: Käytä rasvatonta maitoa ja jätä pois ylimääräinen kinuskikastike ja/tai kermavaahto ja saat lopputulokseksi Starbucksin kahvin vain vähillä kaloreilla!

TIP: Use skinny milk and skip the excess caramel sauce and/or whipped cream and you have a Starbucks coffee with such a few calories!

2014/07/22

♣ Details make the difference

Kolme faktaa minusta:
#1: On hyvin mahdollista, että olette huomanneet, kuinka tykkään koristella oikeastaan kaikkea. Edes shampanjapullot, aurinkolasit tai korvikset eivät selviä seurassani paria päivää pidempään ilman glitterikerrosta tai uutta väriä. Pienet yksityiskohdat tekevät kaikesta paremman.
#2: Rakastan myös järjestää juhlia. Rakastan väriteeman valitsemista ja siinä pysymisen yrittämistä niin hyvin kuin mahdollista.
#3: Vihaan käyttää paljon rahaa ja yritän aina löytää halvan tavan kaikkeen.

Three facts about me:
#1: It is highly possible that you have noticed how I like to decorate pretty much everything. Not even champagne bottles, sunglasses or earrings survive more than a few days in my presence without getting a coat of glitter or new color. Small details make everything better.
#2: I also love throwing parties. I love picking out the color theme and trying to stick to it as well as possible. 
#3: I hate to spend lots of money and I'm always trying to find a cheap way of doing everything.
marble5
On siis itsestäänselvää, että kaikissa bileissä, jotka järjestän, on hienovarainen väriteema - jos väriteema on punainen, en osta punaisia tuoleja, lautasia ja ilmapalloja, vaan teen punaisia cocktaileja ja ostan punaisia kukkia ja lautasliinoja. Siten juttu pysyy tarpeeksi simppelinä ja maksaa minulle - no, lähemmäs ei mitään.

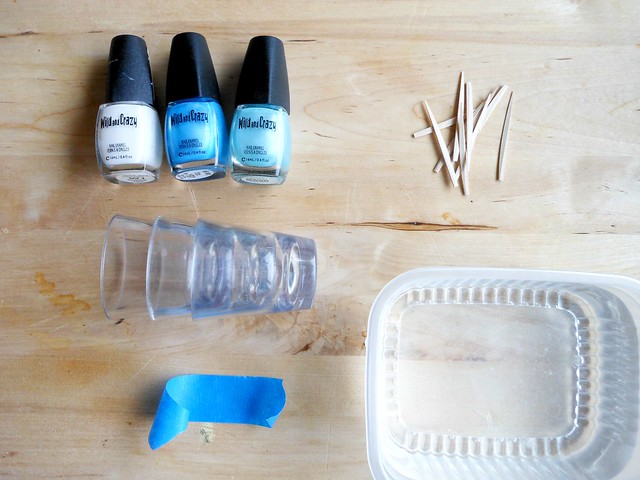
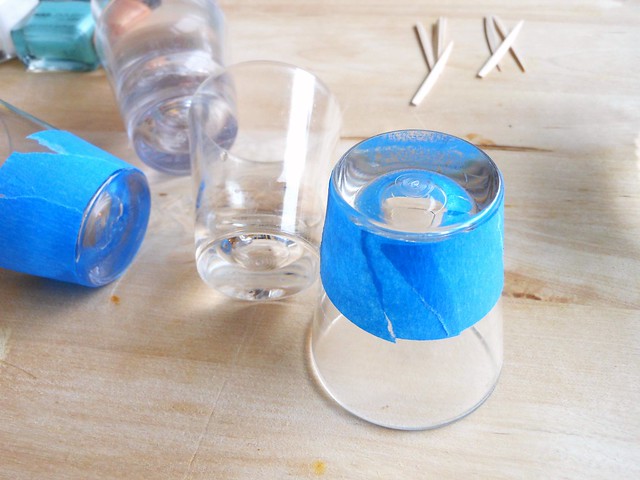
Loin tämän siistin tavan pysytellä väriteemassa pari viikkoa sitten. Tämä tapa on täydellinen juhliin, sillä koristelu on tehty kynsilakoilla. Okei okei, neljäs fakta musta: koristelen kaiken pakonomaisesti kynsilakoilla, koska pääsen koristeista siten eroon koska vain haluan. Kaikki, mitä tarvitsetkin tätä pikkuista projektia varten ovat pieni rasia ja vettä, hammastikkuja, kynsilakkoja, teippiä ja shottilaseja.

So it is clear that every party I throw has a certain, subtle color theme - if the color theme is red, I don't buy red chairs, plates and balloons, I make red cocktails and buy red flowers and red napkins. That way it is subtle enough and costs me - well, pretty close to nothing.

I created this cool way to stay in the color theme a few weeks back. It is prefect for parties since the decoration is made with nail polish. Okay okay, a fourth fact about me: I am obsessed with decorating with nail polishes because I can get rid of it whenever I want. Everything you will need for this tiny project is a small container and water, toothpicks, nail polishes, tape and shot glasses.
marble2
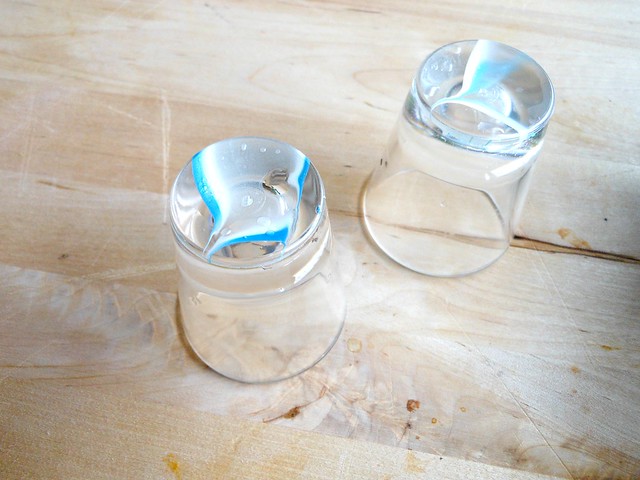
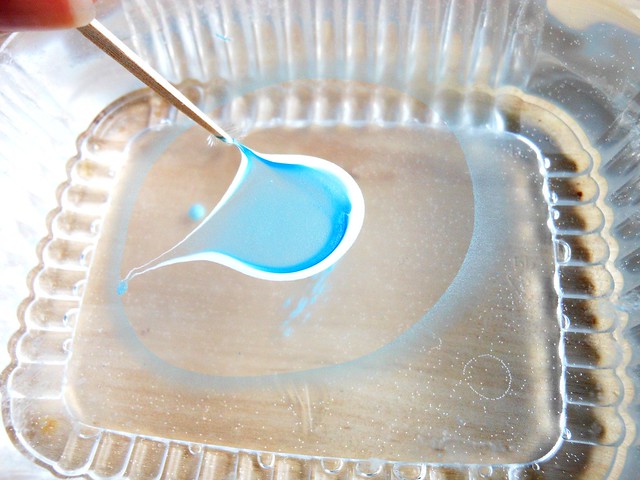
Lyhyesti idea on vesimarmoroida shottilasien pohjat - ja kyllä, voit tehdä saman myös normaaleille juomalaseille, kynttiläkupeille tai maljakoille, periaatteessa minkä vain tahdot koristella. Vesimarmorointi on superyksinkertaista kun vain ymmärrät sen, enkä mä ole kovin hyvä yksityiskohtaisessa selittämisessä, joten suosittelen siirtymään youtubeen ja etsimään helpon vesimarmorointitutoriaalin sieltä. Usko pois, se on helppoa. Älä pelkää.

Briefly the idea of this project is to water marble the bottoms of shot glasses - and yes, you can do this to normal drinking glasses, candle holders or vases, basically anything you want to decorate. Water marbling is super easy once you understand it, and I'm not very good at detailed explaining, so I recommend going to youtube and finding an easy water marbling tutorial there. Believe me, it is easy. Don't be scared.
marble3
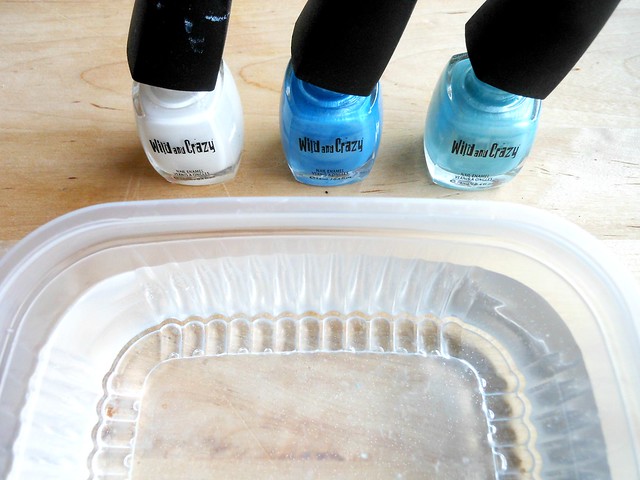
Kun olet saanut otteen vesimarmoroinnin perusjutuista, teippaa shottilasien reunat niin, että vain pohja on paljas. Tiputa sitten pisaroita kynsilakkaan rasialliseen kylmää vettä ja muotoile abstrakti kuvio hammastikulla - muista vain toimia nopeasti, sillä kynsilakka asettuu aika pian.

When you've got the hang of water marbling, tape the sides of shot glasses so that only the bottom is showing. Then drop drops of nail polish into the container of cold water and style your abstract design with a toothpick - remember to make it quick, the nail polish sets quite fast.
marble1 marble4
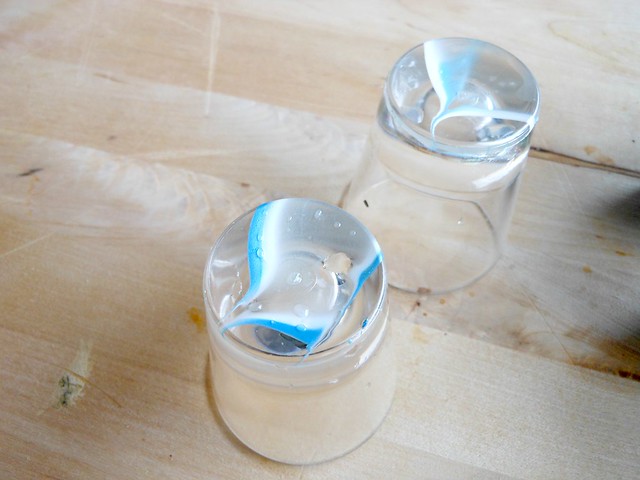
Hammastikulla leikkimisen jälkeen dippaa hitaasti shottilasi veteen ja kerää ylijäämäkynsilakka ympäriltä hammastikulla. (Ihan oikeasti, katsokaa youtubetutoriaali, edes mä en ymmärrä tästä selityksestä mitään, vaikka vähintään mun pitäisi). Sen jälkeen nosta shottilasi vedestä ja aseta kuivumaan. Kuivumisen jälkeen poista teipit ja oletkin valmis!

After playing with the toothpick slowly dip the shot glass into the water and gather the excess nail polish with a toothpick. (Seriously, watch a youtube tutorial, even I don't understand this explanation and I'm the one who should at least). Now raise the shot glass from the water and set to dry. When it has dried, remove the tapes and you're all done!
marble6
Mikä lopulta yllätti minut eniten positiivisesti oli se, että nämä shottilasit päätyivät astianpesukoneeseen vahingossa. Ja uskokaa tai älkää, mutta kynsilakkakerros säilyi moitteettomasti! Eli kyllä, voit pestä nämä ja kun haluat kuviosta eroon, pyyhi se vain pois kynsilakanpoistoaineella. 

Siinäpä se, superhelppo tapa pysyä väriteemassa lähes kokonaan ilman rahaa tai vaivaa.

Now, what surprised me positively was that these shot glasses accidentally ended up in the dishwasher and believe it or not, the coat of nail polish survived impeccably. So yes, you can wash these and when you want to get rid of the decoration, just wipe it off with nail polish remover.

There, a super easy way of staying in the color theme with almost no money or trouble at all.

2014/07/14

♣ A sorbet that will make you smile

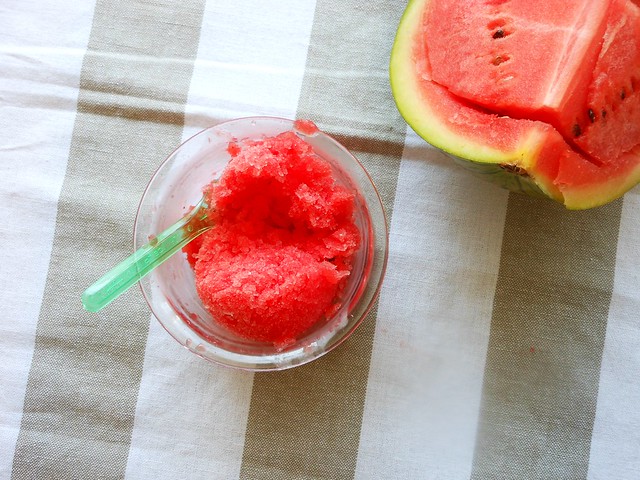
Sorbetti joka saa sut hymyilemään... tai mun tapauksessa makaamaan lattialla, julistamaan rakkauttani kaikille ja nauramaan kontrolloimattomasti. Tämän sorbetin salainen ainesosa on likööri.

...or, in my case, lay on the floor, shout "I love you" to everyone and laugh uncontrollably. The secret ingredient of this sorbet is liqueur.
watermelon2
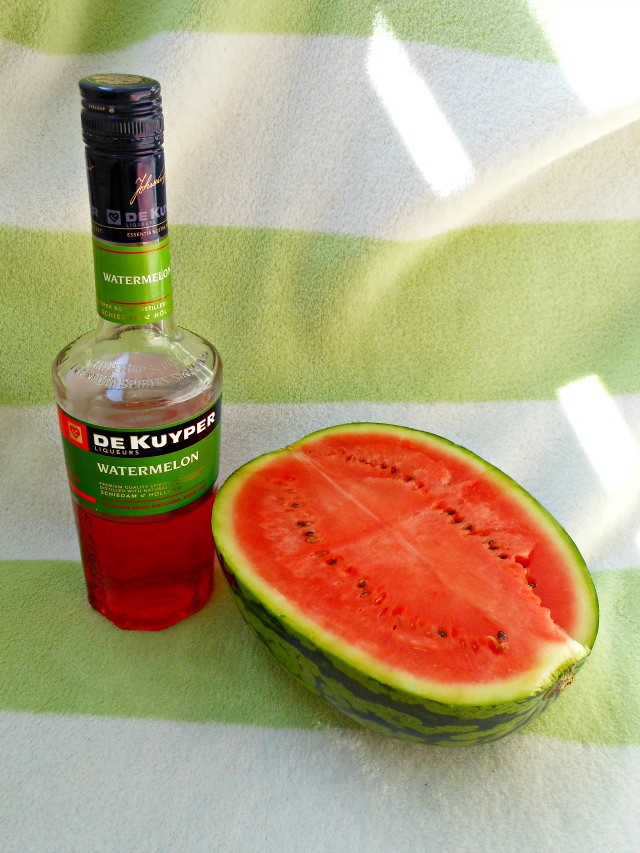
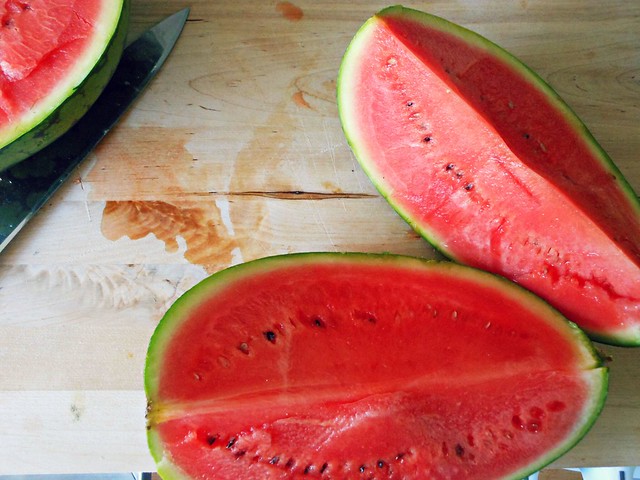
Mä tein sorbetteja muutama postaus sitten. Resepti oli superyksinkertainen ja ajattelin, ettei se voisi helpommaksi enää tullakkaan - toisin kävi. Tätä ihanaa sorbettia varten tarvitset vesimelonia ja vesimelonilikööriä. PISTE. Kaksi ainesosaa! Toki voit lisätä Spriteä tai kivennäisvettä laimentamaan seosta hieman, sillä se on aika makeaa.

I made sorbets a few posts back. The recipe was super-simple and I thought it couldn't get any simpler - but it did. For this amazing sorbet the only things you will need are watermelon and watermelon liqueur. PERIOD. Two ingredients! Of course, you can add some Sprite or mineral water or whatever to thin the mixture a bit because it's quite sweet.
watermelon1 watermelon4
Tässäpä ohjeet:
1. Ota suunnilleen 200 grammaa vesimelonia
2. Ota siemenet pois
3. Laita pakastimeen, kunnes vesimeloni on jäätynyt
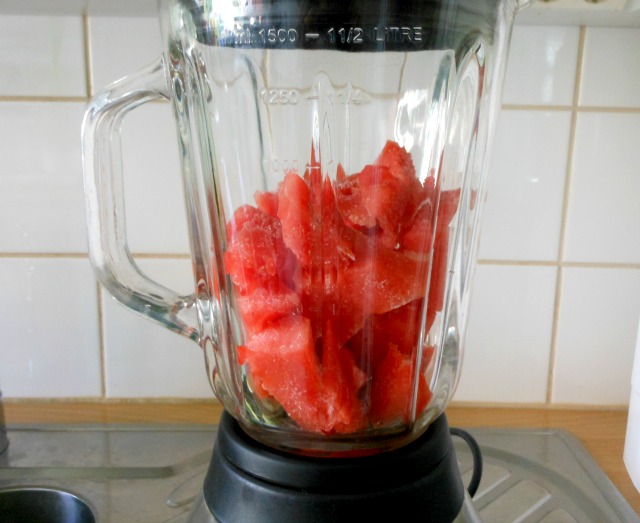
4. Sekoita blenderissä
5. Lisää likööri
Vapaavalintainen: 6. lisää sokeria, sitruunamehua, Spriteä tai mitä vain tehdäksesi siitä täydellistä juuri sinulle
7. Aseta taas pakkaseen ja sekoittele välillä.

Here are the steps:
1. Take about 200 grams of watermelon
2. Take off the seeds
3. Place in the freezer until frozen
4. Blend in a blender
5. Add liqueur
Optional: 6. add sugar, lemon juice, Sprite or whatever to make it just perfect for you
7. Place in the freezer and mix every once in a while.
watermelon3
Ja niin helppoa se on. Tämä on täydellinen kesäherkku, ota mukaan piknikille tai biitsille tai tarjoile grillibileissä. Sorbetti on viileää, makeaa, hedelmäistä ja sisältää alkoholia - kaverisi tulevat rakastamaan sitä!

And that's how easy it is. This is the perfect summer treat, take it to a picnic or to the beach or serve at a BBQ party. It's cool, sweet, fruity and includes alcohol - your friends will love it!